Thursday, July 27, 2006

finishing projects

Ah! Got a few things finished off that had been hanging around the house, making me feel guilty. First up, my matching craft (or beet-cutting, or tomato-sauce-making) apron to go with Emily's:

big dot apron

This was an easy one, it was cut out and all I needed to do was stitch the bias tape around all the edges (and I just left extra at the corners for the ties!). I still have some of this laminated fabric left, and now I'm thinking...matching placemats!!

I also finished up this crossover top I had made for Emily:

ladybug top

It's modified from one of the many patterns that are out there for this perennial -- I altered it to copy a top I had as a kid. I don't have the original top or pattern, but what I did have was a little copy of it that one of my parents made for a doll I had! The main change is that the front is straight across, and in the back the wrap part is cut at a different angle. Mmmm, hard to describe actually, you'll just have to take my word for it. Anyway, it had been done for a bit, just needed buttonholes and buttons. Check out the cute little ladybug buttons I'd forgotten I had!

Monday, July 24, 2006

yo gabba goodness!

If you remember the kid's show I posted about a while back, Yo Gabba Gabba, well, they have some new stuff to entertain your little Gabba addict (if you have one like we do!). They now have a page of sample clips up along with the trailer! yay! Unfortunately, the songs are gone, but I'm sure they'll have more fun stuff up soon. There was a premiere in LA recently (Emily was invited! But of course we couldn't exactly go...) and hopefully the DVD will be out soon. In the meantime, here's our current favorite clip, "Please Thank You". Go Gabba Gabba!


Tuesday, July 18, 2006

the recipes!

apron swap recipe cards

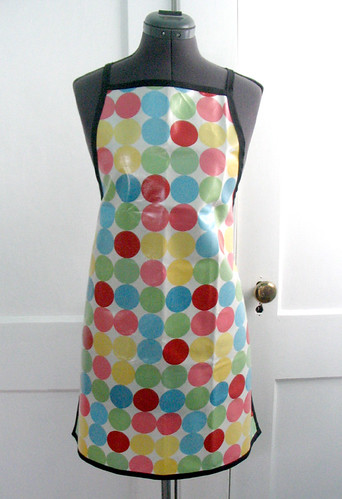
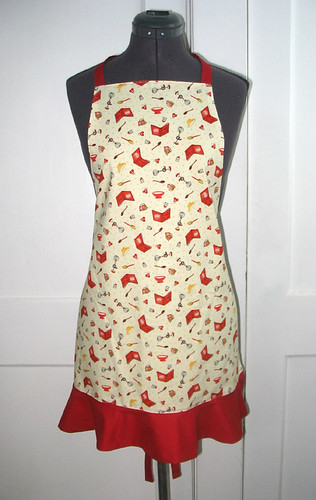
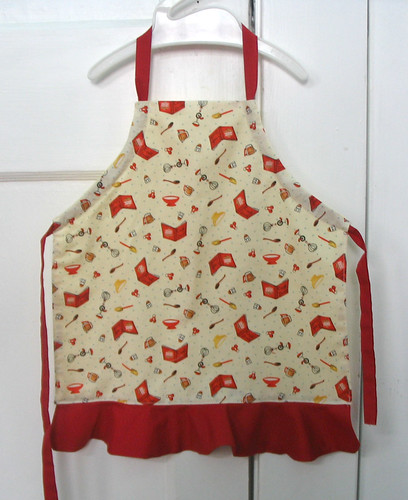
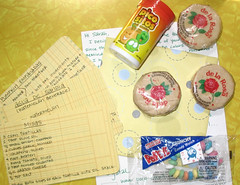
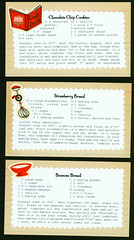
Those are the recipe cards I made for Heather to match her apron. All baking: strawberry bread, banana bread, and a really good (and freezable) chocolate chip recipe. All three are well tested in our kitchen! (I could probably make that banana bread in my sleep!) The little designs are actually cut-outs from the fabric, and the bases are vintage blank recipe cards, with the recipes cut out and glued down.

In case you're interested, here are the actual recipes:

Strawberry Bread
1-1/2 c fresh strawberries, rinsed, cored and sliced
1 c sugar
1-1/2 c flour
1 t baking powder
1/2 t baking soda
1/4 t salt
1 t cinnamon
2 eggs
1/2 t vanilla
1/2 c butter, melted and then cooled (very important!)
Preheat oven to 350°. Lightly grease and flour an 8"x5" loaf pan. Place strawberries in a small bowl and sprinkle with 1/2 cup of the sugar; mix and set aside. In a large bowl, mix together all remaining dry ingredients. In your medium bowl, beat eggs til foamy, then add the vanilla and butter, then the strawberry-sugar mixture. Combine with the dry ingredients, mixing until completely moistened. Scrape batter into pan and bake for 60 minutes, or until a toothpick/skewer comes out clean. Cool pan on a rack for 20-30 minutes before removing.

Chocolate Chip Cookies
1/2 c unsalted butter,
softened
6 T sugar
6 T light brown sugar
1/4 t salt
1-1/2 t vanilla
1 c plus 2 T flour
1/2 baking soda
1 c chocolate chips
1 c pecan or walnut pieces
Preheat oven to 375°. Beat the butter, sugars, salt and vanilla until well-combined. Add in the egg, scrape bowl down with spatula and beat for a few more seconds. In a 2nd bowl, whisk together the flour and soda. Add dry ingredients to wet and mix on low speed until just blended. Add chocolate and nuts and mix in by hand. Shape dough into 11/2” balls and place about 3” apart on ungreased cookie sheets. Bake for 9-12 minutes, until edges are golden. Let sit for 5 minutes before transferring to wire racks.
Alternately: do not preheat oven, and place shaped cookies close together on cookie sheets and freeze. Transfer when frozen to freezer bags or containers, bake at 375° in batches as small or large as you like.

Banana Bread
2 large eggs
1 c sugar
1/3 c vegetable oil
1 c mashed bananas
2 t vanilla
1 t baking soda
1 t baking powder
1 t salt
1 t cinnamon
1/2 t nutmeg
2-2/3 c flour
1 c sour cream
Preheat oven to 350°. Beat together the eggs, sugar and oil. Blend in the bananas and vanilla. In another bowl, whisk together all dry ingredients and then add all at once to the banana mixture. Mix quickly but thoroughly, then stir in the sour cream, mixing until just combined. Pour batter into a greased and floured 9"x5" pan. Bake for 1 hour, or until a cake tester comes out clean.

Notes: On the banana bread - I am a purist and I don't like nuts or chocolate in my banana bread, but the original recipe (from King Arthur Flour) calls for up to 1 cup of chopped nuts as an option, and I'm sure chips would work too. Also, you can substitute yogurt or buttermilk for the sour cream, but I don't think it works as well. The strawberry bread is from a Penzey's Spice catalog and my onw note on that is that you can chop the berries up if you need to (Emily doesn't like the texture of the large slices). The cookies are from a chronicle books fundraiser called From Our House To Yours, I can't remember the origin past that.

Sunday, July 16, 2006

aprons, aprons, everywhere!

So this weekend was the big (if virtual) apron swapping party! I hope everyone who participated was as happy with the results as I was -- I loved the apron I made and the apron that I got! First, here's what I made:

what's cookin' 1 - baking theme

I drew Heather, who loves to bake, and ended up going with a baking theme for my apron and recipes. I happened to have this really cute baking themed retro fabric in a wishlist, without any idea what to use it for. And when Heather posted a link to this apron (as a "dream" apron) I was totally inspired by the ruffle motif, and came up with the design you see above. I was really happy with the ruffle on mine, although I didn't get a good pic before sending it off. I was so happy with this apron, in fact, that I made one for myself as well! And then...I made a little matching one for Emily!

baking apron mini!

I was already in a mini-apron mood, because I made a craft/play apron for Emily's pal Tess' birthday gift -- it's a reversible apron, with one side laminated for messy crafts:

reversible mini apron - craft side

and the other side a pretty floral to go with her kitchen when she "cooks":

reversible mini apron - cooking side

And yes, Emily has a match of that one, too!

Finally, here's the apron I got from my partner, Crystal:

my apron!

It's so cute! And it really is exactly what I was hoping people would get from this swap -- something that you really like that you would never think to make for yourself. She also sent me some recipes I'm dying to try (well, the empanadas will have to wait, the oven is verboten for the next month or so) and some other goodies. See?

yum!

Now you might think that's enough aprons for now but...I think I need an apron to match the mini craft apron. And Emily needs (for real) an art smock or something, because those washable crayons? Guess what, they don't always wash out! So stay tuned for more aprony goodness!

Tuesday, July 11, 2006

my birth date says all that?

Not tagged by Mary Ann, just copycatted from her:


Your Birthdate: October 18


You are a cohesive force - able to bring many people together for a common cause.

You tend to excel in work situations, but you also facilitate a lot of social gatherings too.

Beyond being a good leader, you are good at inspiring others.

You also keep your powerful emotions in check - you know when to emote and when to repress.


Your strength: Emotional maturity beyond your years


Your weakness: Wearing yourself down with too many responsibilities


Your power color: Crimson red


Your power symbol: Snowflake


Your power month: September


Wednesday, July 5, 2006

wacky cake

By request, here's the recipe for the WWII-era ration cake recipe I used for the s'mores mini-cakes; it's called "wacky cake" and if you google that phrase you'll actually find the recipe all over the place. However, I'm using a version that was reworked slightly by the America's Test Kitchen people for their Cook's Country magazine (which, btw, I love). You can see the usual version here; according to the research in the Cook's Country article, it was first published in 1949 in a collection of reader recipes and was submitted by one Mrs. Donald Adam of Detroit. I think their ingredient changes are worth following:

1 1/2 c unbleached all-purpose flour
3/4 c sugar
1/4 c unsweetened cocoa
3/4 t baking soda
1/2 teaspoon salt
1 t vanilla
1 T vinegar
5 T vegetable oil
1 c cold water

the directions in all recipes are almost all exactly the same: Preheat oven to 350° F; sift dry ingredients into an 8x8 baking pan (I actually dump them all in and whisk together); make one large hole and two small in the mixture, pouring the oil into the large hole and the vanilla and vinegar into the small ones -- then, pour the water over the whole thing, mix quickly until moistened (do not beat) and pop into the oven for 30 minutes. I have never frosted this cake, just eaten it straight or sprinkled powdered sugar on before serving. ALSO: don't try this the first time if company's coming! My first one was a disaster (I was nervous about overmixing and there were huge streaks of flour through it!) and while hopefully yours won't be, it is slightly weird so play it safe! Some recipes say to mix in a bowl and then pour into a pan, but according to Cook's Country you risk having it not rise as well.

This cake is seriously quick and easy, cheap, vegan and really good if you like chocolate cake!

WHOAH! STOP THE PRESSES! Astute reader Melanie caught a typo in the recipe (I sent her a scan of the original), which I've just fixed. The amounts on the vanilla and vinegar were switched -- oops!! What you see now is correct. Sorry!

Monday, July 3, 2006

s'mores mini-cakes!

s'mores mini-cakes

Sort of in the cupcake tradition, but really far enough removed that I'm just going to call them "mini-cakes". These are the cakes I made for Emily's half-birthday party (which was just the three of us!) -- graham cracker squares, topped with little slabs of chocolate cake, with mini-marshmallows broiled on top of the whole thing. Extra-exciting was that I finally used my broiler for the first time -- I don't know why I've been so nervous about it! The crackers were like little edible plates, and surprisinly softened up enough in the few moments in the oven to eat as part of the cake; the cake itself is from scratch and is a WWII ration cake recipe that I love -- no eggs or milk!; and the marshmallows I stuck on by brushing the cake tops with water and then just placing them on. I then broiled them all until they looked like this (maybe 2-3 minutes?). And they were delicious. (I actually liked the broiled marshmallows as a topping a lot -- I'm not really that big a fan of frosting.) A definite to-make-again!

Related Posts Plugin for WordPress, Blogger...