Sunday, February 14, 2010

Friday, February 12, 2010

Cooking with Cartoonists: Light Chocolate Cake

Many years ago, I bought a copy of The Cartoonist Cookbook, a book put together in 1966 by the Newspaper Comics Council, featuring 45 popular strip cartoonists of the 60s, with bios, art and recipes. It's a fun thing to have if you like cartooning, but I somehow never got around to actually cooking from it. This year, I decided to work my way through it and try and do at least one recipe from each artist!

Going alphabetically, my first artist (I'm skipping Neal Adams) is Alfred Andriola, who drew crime comic Kerry Drake for decades. He apparently lived a pretty happy bachelor lifestyle in Greenwich Village and gives us a nice date-night-back-at-the-bachelor-pad menu (he even gives you music suggestions based on your dinner companion's hair -- Sabrica's Flamenco for brunettes; Strauss' Salome for blondes). The whole dinner?


Prosciutto and Melon

(he says you should only buy prosciutto in a good Italian market)

Filet of Chicken Kiev

Spinach (or corn) souffle

Tomato Salad

Light Chocolate Cake

Coffee


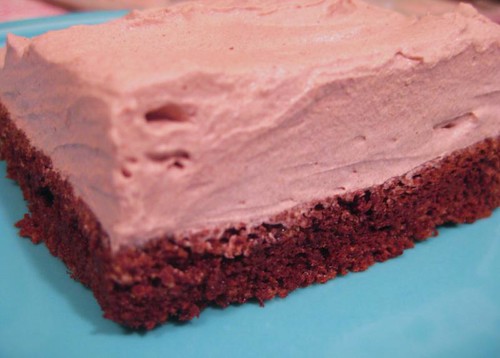
It all sounds good, but our pick was (shocking!) the dessert, which came out wonderfully (and lasted us 2 days, so about 6 servings). Behold:

andriola's cake


The cake layer there is shorter than it should be, my pan was too wide. (You really need to use an 8x8 for this one.) Basically, it's a flourless sponge cake, topped with a chocolate whipped cream. And amazingly good. Surprisingly, I couldn't find any cake recipes online that were like this -- they were all either only technically flourless (they used matzo meal or something like that) or they were very dense. Here's how Alfred makes it (note, I skipped both the almond extract in the cake, and the chopped almonds on the topping as no-one here likes almonds but me):

Cake:
3 eggs, separated
5 T sugar
3 T cocoa
1 t vanilla
½ t almond extract
½ t cinnamon

Preheat oven to 350° . Whisk egg yolks, adding sugar gradually and then continue whisking until creamy. Add cocoa, extract and cinnamon and whisk until smooth. Beat egg whites (in a stand mixer!) until they form stiff peaks, and then fold gently into chocolatey mixture. Pour into 8" x 8" pan, lined with parchment or waxed paper and then greased and floured. Bake for 25 minutes. Let cool before removing from pan and peeling off paper.

Topping:
1½ c heavy cream
¼ c sugar
2 T cocoa
½ t vanilla
Mix all ingredients together and chill for at least an hour (I put them all into a covered container, shook hard, and then put in the fridge for probably 4-5 hours. You can do this up to a day ahead, I'd think.) Whip until firm, and spread over cooled cake. Optionally, sprinkle with chopped almonds.

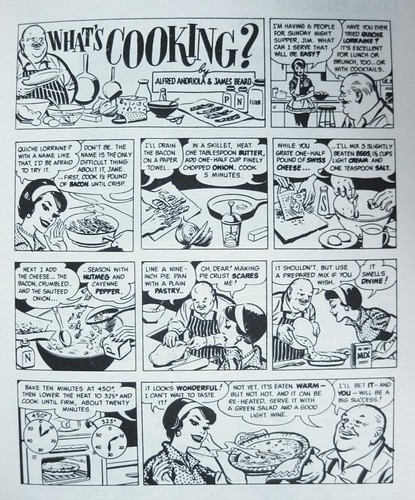
Bonus!! Alfred was neighbors and pals with James Beard, and the two of them collaborated on what must be James Beard's only comics credit:

"What's Cooking" 1966 comic


Tuesday, February 9, 2010

pattern project! (or, Emily gets more aprons)

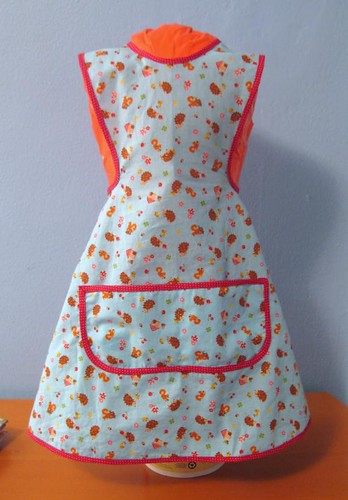
hedgehog apron


Last year I found out about the Commercial Pattern Archive at the University of Rhode Island (I thought I had blogged about it, but I can't find anything -- I found out about it on dressaday.com) when they had a week of free access. If you've never heard of the collection, it's an archive of sewing patterns from the 1860s to the present -- I believe they have something like 50,000 patterns! The original (complete) patterns are in their archives and available to researchers, but you can access a good bit of info online. Membership isn't cheap, but I got in on a group membership and have been wasting time there ever since!

I've often wondered if I would ever be able to recreate a pattern from the information they have online (usually you get an image from the front of the pattern, plus a "pattern schematic"; you get some text info but no instructions). I'm sure if I could draft patterns I could do it just by looking at the picture but, well, I can't draft patterns! But I finally decided to give it a go as a reward for all the boring utilitarian sewing I've been doing.

I thought an apron would be easy, and making it for Emily would keep it smaller in case I had trouble. (Plus, she is low on aprons having grown out of all but 1 baking apron.) To my surprise, it was a pretty simple operation! Within a couple days, Emily had a new vintage-y apron! It's super-cute, functional and very girly, so she loves it.

In fact, a second one is already cut out and ready to sew -- but this time, it's made from some Tenggren Saggy Baggy Elephant fabric! So cute! Now I think I have to make one for myself.

If you want details on the probably boring technical process, keep reading; otherwise, have a good week and stay tuned for a cool chocolate dessert recipe coming soon!


My unwieldy reconstruction process:

The first thing I did was to just google the pattern (Simplicity 7091) and see what I could find -- I was able to find images of the pattern envelope, which I printed out and used as visual reference (not to mention, to help estimate the amount of bias binding I'd need!)

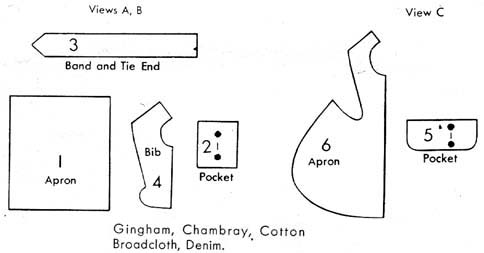
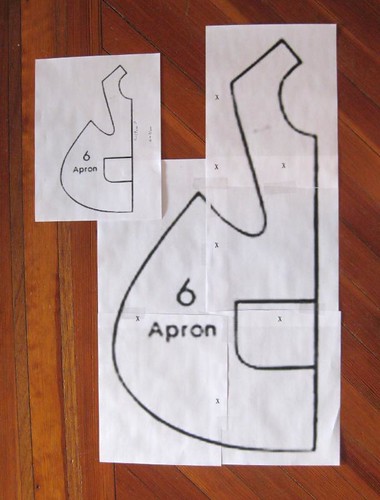
Next, I edited the pattern schematic in photoshop to only contain the pieces for the view I was making (view C), overlapping the pieces so that they would take up less room when printed (here's the image).

I then enlarged my resulting image to fill an 8-1/2" x 11" piece of paper, and printed it. I chose a key line (in this case the center front fold line), measured it, figured out how long it should be on the final pattern, and then used a proportion calculator to find out how much more it needed to be enlarged to print out at the size I wanted it. (At this point, I also scattered little "x" marks all over the image so I'd have an easier time matching everything up when I blew it up further.)

Finally, I enlarged the image again by the percentage the calculator gave me, printed it out in pieces and then taped it all together. Here you can see the 8-1/2"x11" version next to the full-size printout after assembling it.

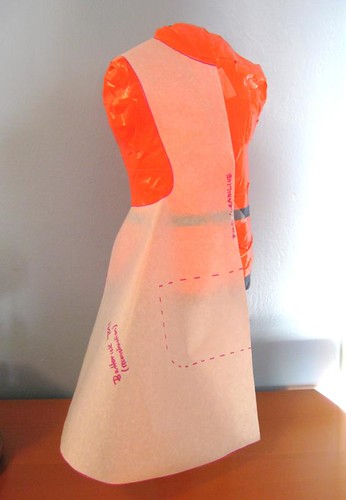
From that point on, I did what I'd do with any pattern you need to trace -- I traced it onto pattern paper and did a tissue fit, I went ahead and did a muslin, to make sure it really would work, and at last I made up the final version.

Definitely a fun challenge, although a lot of people might not think so!

Sunday, February 7, 2010

prettiest matroyshkas ever


nestinggroup.jpg


So adorable. So sold out. But so easy to copy! I am totally going to have to make myself Emily a set of these!

Saturday, January 30, 2010

so cold on a saturday!

It is freezing this weekend! I'm about to make the biscuits again to warm us all up. (Hot chocolate later, I think!)

In the meantime, the pan-da family are keeping me company:

panda family

Emily's pan looks so cute on the stove with my big one! I want a whole kitchen full of them!

Tuesday, January 26, 2010

sew kinda boring

Since the excitement of making Emily's coat ended, sewing has been more than a little mundane...I darned socks. (really!) I have lengthened every pair of pajamas that Emily owns. I have attempted to alter a favorite dress that got way too small (just didn't work out). And I have made draft stoppers.

kitchen draft stopper


Boring to make, but actually kind of exciting to have finished, because they have made a huge difference! Our house was built in 1919 and still has a lot of original windows, some of which are soooooo drafty. Every year I'd say "I ought to figure out to make some draft stoppers for those" but then I never got around to doing it. Finally, after a week of high winds coming up from the water, I did it.

I didn't bother to even look for any directions online, I'm sure there are plenty. But I just forged ahead and did what I thought would work -- and it did! I measured the windows and then cut rectangles that were the width of each window plus 1-1/2" long; and 7-1/2" wide. I used french seams for extra strength, and seamed the rectangles along the long edge and one short edge. Emily and I then filled them with play sand using a kitchen funnel (that was fun, if a little messy!), and then I rolled the open ends over, pinned them and then very carefully brought them back upstairs and sewed them closed. We put them in the windows and seriously, the temperature in the house climbed within just 2 or 3 hours.

Sewing hasn't been all boring though, Emily has her own machine now and has started making things! But more on that later. Ha ha, and I totally forgot, I made a new flannel robe from a vintage pattern for Evan...where is my brain? More on that later, too!


Sunday, January 24, 2010

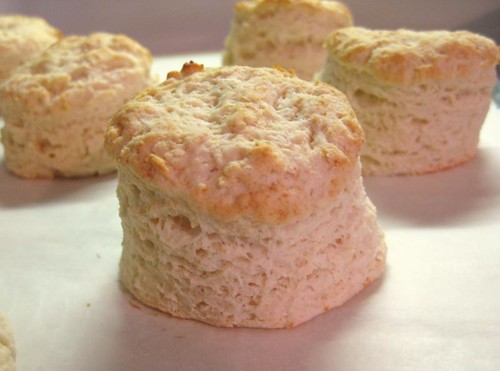
best biscuits ever

And possibly the easiest, too. If you have a food processor, that is. Emily and I had ours with butter and honey, Evan went for straight butter. Thumbs up from everyone!

biscuits


Seriously, I have never tried a biscuit recipe that grew so tall in the oven! Try these for yourself! Recipe here.

Related Posts Plugin for WordPress, Blogger...