Showing posts with label crafty. Show all posts

Wednesday, March 17, 2010

last call for moleskine covers!

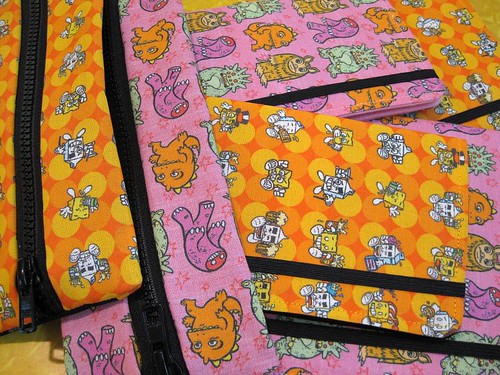
We're clearing out the last of the moleskine covers I made out of our Spoonflower fabric, featuring Evan's Milk & Cheese and Monster drawings. That's them in the back of this photo (pencil cases are long gone):


the stuff!


There's 1 small and 4 large covers left, all include a moleskine cahier. I don't know if I'll make any more of these -- and if I do it will definitely not be from these fabrics again. So, get them while you can! They're half off the original price on ebay right now. Um, along with a bunch of girl's shoes. Which displays my child's love of the leopard print! Thanks!

Sunday, February 7, 2010

prettiest matroyshkas ever


nestinggroup.jpg


So adorable. So sold out. But so easy to copy! I am totally going to have to make myself Emily a set of these!

Thursday, November 5, 2009

cute ikea hack

Saw these totally cute stools on the Brainpop blog:

stools.jpg

Looks like they used Frosta stools from Ikea, plus a bunch of Contemporary Home toilet lid covers from Target (which come in a bout a zillion colors). They suggest they'd be great for classrooms - I agree! But also I think they could be pretty cool for your house! They even still stack with the fluffy toppings on!! Super-good idea. Although I'll probably never do it.


Friday, January 30, 2009

CSPIA: time for cautious optimism?

The CPSC has just issued a one-year stay on testing requirements for the CPSIA. This means, people can keep selling! However, they are still liable if they do sell anything that doesn't meet the limits:

Manufacturers and importers -- large and small -- of children’s products will not need to test or certify to these new requirements, but will need to meet the lead and phthalates limits, mandatory toy standards and other requirements.

The good: etsy can live on! I can finish off those baby blankets and try to sell them (except, I think, for the one with metallic fibers....). The insanely expensive testing is suspended for a year -- and during this year, perhaps Congress can modify this law to make it work.

The bad: this could make the movement to fix this lose steam, if people think everything is fine, and we'll all be back where we are now next year. And, no-one is completely off the hook, even in handcrafts:

Handmade garment makers are cautioned to know whether the zippers, buttons and other fasteners they are using contain lead. Likewise, handmade toy manufacturers need to know whether their products, if using plastic or soft flexible vinyl, contain phthalates.

It looks like anything painted still does have to be tested, along with a handful of other things. I'm pretty sure that was required already, however, so won't change anything.

A good and cautious analysis is up at ZRecommends.

Wednesday, December 10, 2008

the death of handmade?

I honestly can hardly believe what I found out this morning, it seems so insane. But basically, it seems that in Congress' rush to compensate for the toy recall disasters of 2007, they have passed legislation that puts all small crafters out of business as of February 9th. No handmade toys, clothes, accessories, decor, or anything can be sold for any kid under 12. No craft fairs, no etsy, nothing. Like I said....INSANE. But it's true. Don't believe me? (I know you don't want to!) Check out this article at Fashion Incubator, which is a pretty good intro. Go to the Handmade Toy Alliance's web page. If you've got the stomach to read more, start with this (very long) etsy thread on the subject -- and at least go to this page and scroll down to Meitaibaby's post, which is excellent and says in part:
As written, this applies TO YOU AND ME. Yes, the little guys. The craft-fair sellers. The artisans. If you do not comply with the new regulations, you will be in violation of the law and will be selling illegally....We MUST be proactive and let our representatives know that the law as written is dangerous. If not, there will be a lot of a) new felons as of Feb. 10 or b) a lot of bankrupt businesses on that day.


There seems to be a lot of confusion (and again, disbelief) about this, but there are a lot of clarifications emerging. And it appears that yes, everything (meant for kids under 12) must be tested. (See details here.) The level of testing is different for different items, things like clothing "only" need to be tested for lead, but if there is no change in this law there will be no more handmade items, probably lots of small companies going under...

does this make ANY sense in the situation our country is in? What we need is support for small makers and individuals handmaking goods in their houses! Cottage industry is what we need right now!! If you are a crafter, buyer of craft, or supporter of handmade goods, please spread the word, write your legislator and keep your fingers crossed that someone wakes up and realizes what they did here!

Saturday, August 16, 2008

muno guitar - new and improved!

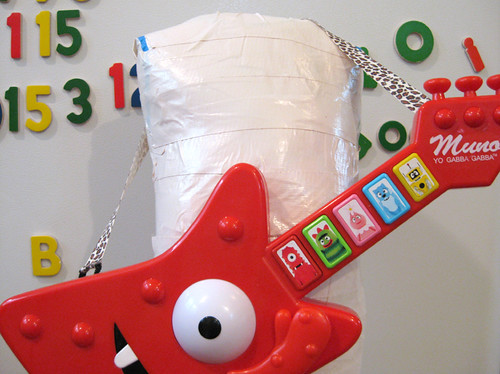
Some of you may have seen the Yo Gabba Gabba toys popping up at Target and Toys R us (and ebay, if you want to pay 10x the real cost...). There's some pretty cute stuff! We ran across them last week and let Emily pick out two -- she went for the talking Brobee and the musical Muno guitar. (I think the guitar was her number one pick!)

Unfortunately, when we got it home and unpacked it, it turned out to be just too heavy for her to hold it and "play" at the same time. She loved it, but she could only play with it on her lap, which was just not fun enough...especially when Cornelius came on and she wanted to rock out 3-year-old style.

I was afraid I was going to have to take the whole thing apart to add a strap that would stay on! But when I started looking at it, I realized that two of the slots in the back that the horrible packaging twisty wire went through were in the perfect spots to improvise a guitar strap! So, I took two short lengths of 3/8" elastic, one length of 1" wide cheetah print ribbon (picked out of my ribbon box by Emily) and a hot glue gun....and ta-da! Guitar strap!

muno guitar - now with strap!!

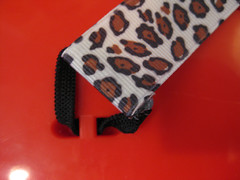
It works perfectly - she can already sling it on and off by herself. Here's a closeup of where it's attached -- basically, I just ran the 3/8" stuff through the little holes, hot glued the ends to the ribbon, and then used lots of hot glue and rolled the ribbon up.

cheetah guitar strap

I could have used a narrow ribbon instead of the elastic, it really has no function -- I just had it handy. You can't take it off, but if it gets too short I'll just cut it off and make a new one. And now she can go crazy during the Super Music Friends Show and play along!

Wednesday, July 2, 2008

spoonflower love

A write-up over at CraftStylish on Spoonflower features a pic of Emily! So cute!!!

Wednesday, June 18, 2008

spoonflower update and what I made!

To everyone who's asked -- yes, Spoonflower have been totally awesome about trying to work out the problem, and are re-doing my fabric and trying to find a way to prevent this from happening again. It's all part of being in beta, I guess! And while I was unhappy about the problems, I am totally happy with the way they have handled it. Fingers crossed the new yard of the monster fabric will be suitable for Emily clothes! In the meantime, I was able to use the unwashed Milk & Cheese fabric and some bits of the Monsters that I....un-squared? Intentionally skewed? back out of shape to accomplish what we wanted to do for Heroes Con, and here is a peek:

sneak!

Okay, I'll let you see them for real:

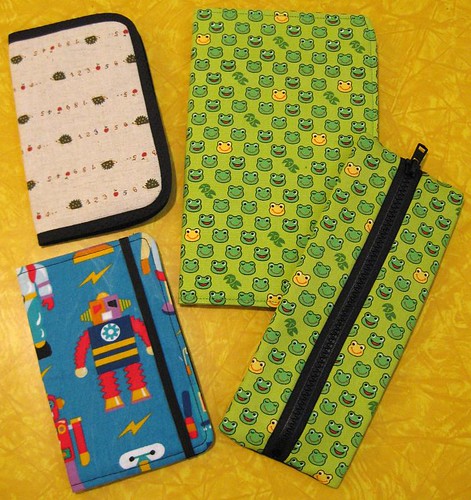
the stuff!

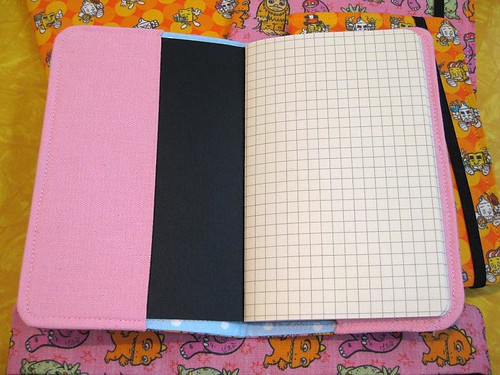
Pencil cases and (refillable) Moleskine jackets for the large and small cahier notebooks (my favorites, notebooks included)! A look at one open:

an inside look

Whoops, that's my own with graph paper! Anyway, we will have a very small number of these for sale at our table, and only 3 or so Monster items in the whole batch (the "or so" meaning, depending on if Emily successfully snags one for herself). So if you're interested, stop on by!

For those of you interested in the process, a few notes: I was slightly wrong about the skewed fabric being totally fine for something like this. It was totally possible to work with it, but omg did I have trouble NOT following the grain when I was sewing! It was giving me conniptions to sew what seemed to be such crooked lines. But other than that, the fabric worked beautifully for these. Here are the prototypes I made while working out my pattern:

prototypes!

#1 - the hedgehog fabric: I decided I hated how it looked with binding around the edges. It works fine, I just didn't like it.
#2 - not pictured: actually, I threw this one out. It was close, but not quite there.
#3 - the frog fabric: this was the one I made once I was sure the pattern was what I wanted, I like this one a lot.
#4 - the robots! Here's the final prototype, after playing with it a bit I decided to add an elastic strap (like the full-size Moleskines) to keep it closed. This one I loved. And in fact, this one is the one I'm using right now.
And finally, the prototype pencil case: no changes from this one, although there was an earlier version that didn't work right. And now I have a matching frog set!

Anyway, that's it, time to pack and get ready to get out of here in the a.m. Have a good weekend!

Tuesday, June 17, 2008

fabric ups and downs

We've been hoping my Spoonflower order would get here in time to have some Special Secret items on our table at Heroes Con -- and today the doorbell rang and there it was! We were all very excited:
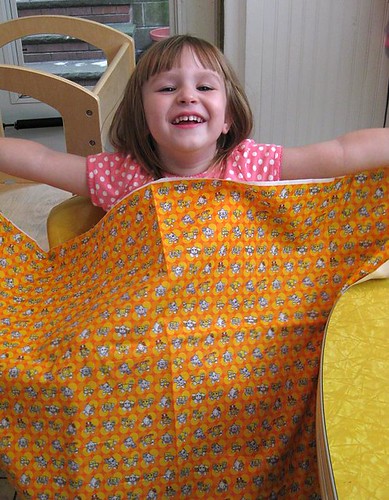
spoonflower fabric

The fabric looked almost exactly like I expected -- slightly lighter, which is probably because I did it so quickly I didn't proof the files on another monitor; and the blacks are a little washed out. But the line weight was good, better than my proof on paper at home. And there is always, always color shifting when you print, especially in RGB. The fabric is a bit heavy -- good for a skirt or jumper, or crafts; definitely too stiff for anything like a blouse, it has very little drape. But all in all, I was very happy with the results:
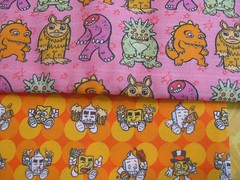
spoonflower fabric

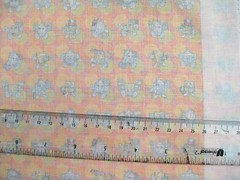
Then, I went to prewash the monster fabric that I intended to make something for Emily out of. It came out of the wash (warm/cool) looking great, no fade or color loss. Came out of the dryer (low heat), again, looked great. I ironed it, and measured it for shrinkage (it didn't shrink at all along the length, and shrunk to about 96% of the original width) -- no effect was visible on the print at all. But suddenly I realized that the print was slanting quite a bit -- and I was certain it had looked perfectly straight before. I tried to square the fabric (in other words, get the grainlines squared to each other, read more about this here), and then realized I couldn't, because it was squared. Thinking I was crazy, I got out a clear ruler -- and sure enough, the print is way off the grainline of the fabric (ignore the apparent curve of the ruler, it's because I used the macro setting):
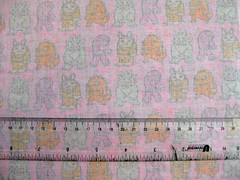
spoonflower fabric

I checked the Milk & Cheese fabric, and sure enough, the fabric (this one is unwashed) is printed perfectly perpendicular to the edge of the fabric:
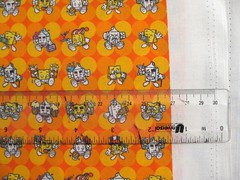
spoonflower fabric

Unfortunately, the grainline is not perpendicular to the edge of the fabric. You can see how much it slants compared to the print here.
spoonflower fabric

My guess is, the fabric as supplied to Spoonflower is already pulled way out of square -- they are printing on it perfectly straight, but once the fabric is washed and straightens itself up, the print is thrown way off. From the front, the grainline is not obvious and you can't really tell -- but if you wash it or attempt to square it up you can never go back. Essentially, this means the fabric is unwashable and not suitable for garments or anything that might need washing. Which was a major, major disappointment for me as the monster fabric was specifically meant for a dress for Emily. (I wouldn't have made it pink if I was going to try and sell things made of it!).

This would probably be fine for a very random print with no straight lines; and of course it is fine as long as you are making items that will never need to be washed. And the good news is, I didn't wash the Milk & Cheese print, so I can still use it (and look for a sneak preview in the next day or two of what I'm doing with that!). And I may be able to salvage the monster fabric -- I am going to try and steam some small blocks back into looking okay; and maybe I can figure out a way to use it as an accent (a ruffle or trim, maybe?) on an outfit when we get back. And fingers crossed this is a problem that can be worked out so I can make Emily her monster dress sometime in the future!!

Friday, June 13, 2008

we're back! and a preview...

Our shore vacation was somehow both relaxing and exhausting. I think the fact that there is an amusement park there on the boardwalk had a lot to do with that. Emily went on every ride she was allowed to, including the giant ferris wheel (and it is a giant one) twice. The girl is fearless!! Anyway, we're trying to unpack and catch up today, but I wanted to show you all the sneak peek I just got of my first Spoonflower order!


At 0:25 you'll the see monster fabric I made up from Evan's monsters for Emily....it's a surprise, if the fabric washes well she'll be getting an outfit out of that. Then at 0:32 there is some tasty Milk & Cheese fabric which is destined for some items we hope to have at Heroes Con in a week. Depending on when it gets here and how fast I can sew!! They look exactly like I had imagined in the preview -- fingers crossed they look as good when they arrive!

Wednesday, June 4, 2008

how did I miss this until today?

Can you believe there is finally a place that will custom print a small length of fabric that you design? It's my dream come true! As well about everyone else's apparently....Spoonflower is a new business that will print out your own designs on fabric which you can then use for clothing, crafts, whatever. And the results I'm seeing on their site look amazing!! Evan and I have wished for a way to make our own fabric for as long as I can remember....and of course now I want to just design fabric for Emily's clothes, ha ha!! I think we would still do some fun prints of our characters as well, of course. Finally, the search for the perfect print would be over! Yes, it's a bit pricey, but it's actually cheaper than many imported fabrics, so not that bad. Especially when you're talking kid's clothes that take just 1-2 yards. My brain is practically boiling with ideas right now. Unfortunately, they are in beta so I have to wait. for. an. invite. and wait. I'm normally a patient person, but I want to make fabric right now!!!! If you want to make fabric, run over and sign up on the list too. And then.....wait.

Saturday, May 24, 2008

robot pajamas!

the robot pjs

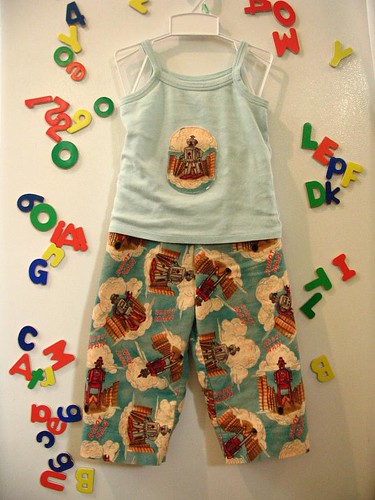
I was not kidding when I said Emily was practically harassing me over wanting robot pajamas. Every day it was "are my robot pajamas done?" "Can I wear robot pajamas tonight?". Finally, finally, she has robot pajamas. Sorry for the wrinkly photo, they're back on her the minute they're out of the laundry.

These were so easy and simple, but just getting going was a saga! I had several vintage kid's pj patterns, but all way too big or small. I went to Joann's with a list of patterns, and, my local Joann's being a total pit, not a single one was in stock. I started flipping through catalogs and found a really nice looking Burda pattern (out of stock of course) and finally a New Look pattern that was actually IN. THE. STORE. At last. Making the actual pajamas was simple. Cut a single pattern piece twice, sew it up, add elastic, sew an applique on a tank top from Old Navy (Emily hates sleeves at night). Okay, maybe that's a slight over-simplification. Still -- so easy, I have already made her 3 more sets!!

Thursday, April 17, 2008

baby aquabats tee

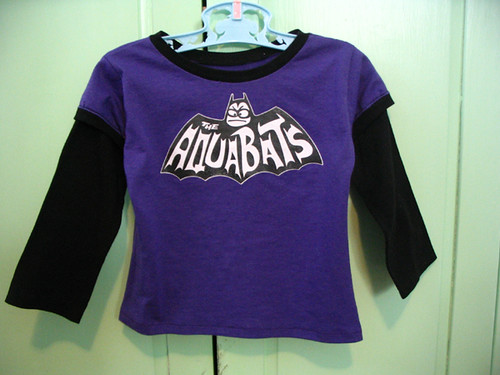
We are totally overwhelmed with work and obligations (so overwhelmed we are not going to be able to get to the NYCC at all this weekend -- sad!) but while I have almost no time to post or go online, I have been wrapping up a number of projects lately. (Especially since Emily's interest in sewing means she will sit near me pushing a needle through some felt while I sew.) Here's a favorite -- my first made-from-scratch t-shirt! (For Emily!) Surprisingly, it was not hard and came out really cute. It's made from a pattern (farbenmix Quiara) and I used two t-shirts I wasn't wearing (they were too big) to make it, so it's also recycled. Crazy!!

bats shirt

Normally, the first time I make a pattern I like to make it without changes, but I did widen the neck a little to get more of the screenprint onto the shirt. I also would have liked a stretchier knit for the neckband, it came out fine but it was a pain to sew. But, we're all happy with the final result. I will definitely be making more tees in the future, now that I know that it's actually possible.

Monday, March 10, 2008

this brilliant idea is not mine

fabric organization

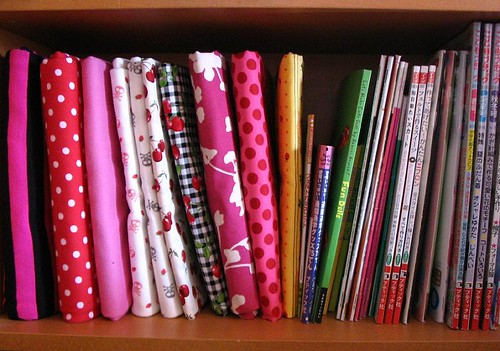
See all that fabric to the left? Standing up all nice and tidy like a row of books? Never to fall into a sloppy pile or tangle into each other again? That is result of my stumbling across this blog post last week, which explains how to use comic book backing boards to organize your fabric, and going "I must do that now!!"

So on our next trip to the local shop, we picked up boards (Golden Age size, if you're interested, so that I can actually store and move the wrapped bundles in magazine size longboxes, and not the ridicuously expensive ones, either), I dug out an extra box of pins and then I got to work.

And I am here to tell you that this is a fabulous system. You can shelve your fabric or bin it and easily see everything at once. And it can't leap out of a cabinet and attempt to kill you, either!

One note: I lost the blog entry and had to go googling around for it, and came up with several posts about different ways to do this; I think it's important to use this particular method which folds fabric over the top and bottom of the board. This will prevent the fabric from slipping off if it's a bit loose or the pin comes out.

Wednesday, March 5, 2008

hairbows!

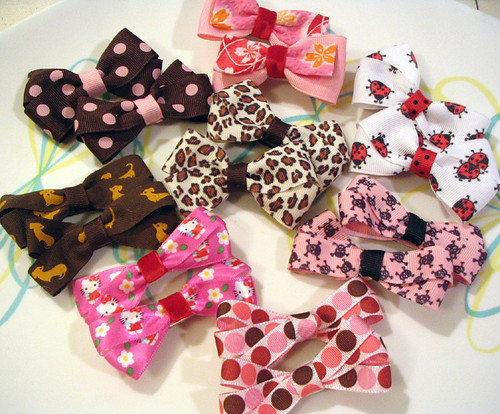
bows for girl's day

Emily has been really into hairbows for the past 6 months or so. I had trouble finding what she wanted though (bows with certain things on them, or to go with certain outfits) so I decided to learn how to make them myself. It ended up being easy enough that I made EIGHT pairs of bows to give her on Girl's Day this past monday. (She also got a doll she'd been pining for since December, and a new dress. More about that soon!) I also made an extra Hello Kitty set at her direction for her to give her friend Josie on Girl's Day.

Now, hopefully she will be satisfied with the sheer quantity and stop asking for more hairbows!! (Although, I admit, now everytime I see a really interesting ribbon I'm like....hmmm....I could make a bow out of that!)

Friday, February 22, 2008

belated valentines

So, since I last posted I have been sick twice, not once but TWICE. First the flu, then after about 3 days being well, a cold settled in. This has been the absolute worst winter of my entire life as far as colds and flu -- usually I get one or none. This year, it's been 2 a month at least. I will be thrilled when spring gets here!! In the meantime, just trying to stay healthy and getting a few things done here and there. (And by the way, if anyone has a sure-fire immunity booster or cold and flu fighter, please let me know about it!)

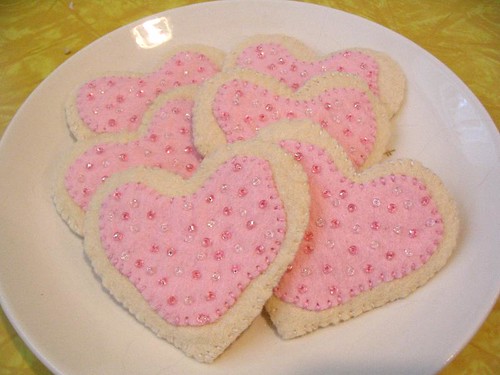
This year, Emily was so into Xmas that she didn't want to see it go...so the small pink tree became a Valentine tree (all it needed was a few hearts and a red garland) and she and I made Valentine heart-pocket-things to replace our stockings. She picked more Aranzi Aronzo designs to glue on and they came out great (no pics though, how did that happen?) We stuffed valentines and little gifts into everyone's hearts and the homemade highlight of Emily's gifts (the real highlight, I have to admit was a set of Hello Kitty cookie cutters) was this set of felt heart-shaped sugar cookies. With icing! And sprinkles!! I want to eat them.

valentine cookies

So, our valentine's day was pretty great, especially since it fell on one of the few days this winter that found all three of us in good health. I hope yours was great too!

Wednesday, January 2, 2008

birthday food!

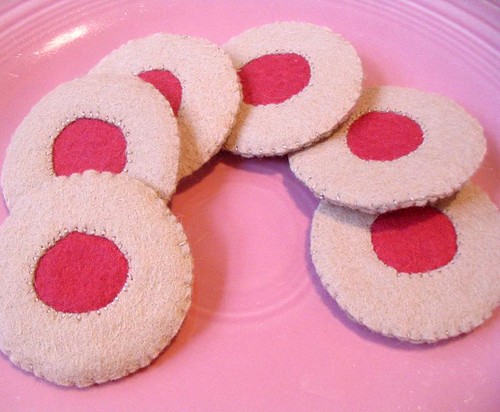
No, not the food we ate, but the food I made! My mom got Emily a basket of Haba play food for her birthday, and we got her a bunch more to complement what my mom sent. I decided she needed more play food and delved into the world of felt food. (I have actually had a Japanese craft book with patterns for felt cakes for a while but had never attempted any.) It turned out to be incredibly easy, and fast -- I did all these in a couple hours the night before her birthday.

thumbprint cookies, not actually something we eat around here but they're like cartoon cookies or something. you know they're cookies:

thumbprint cookies

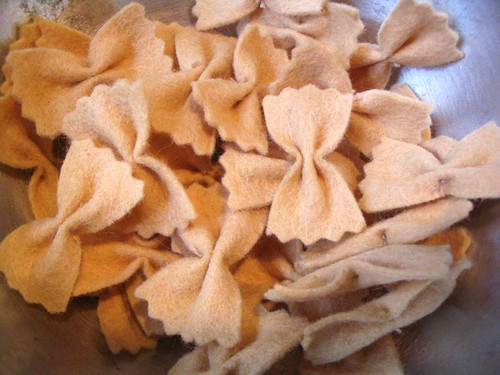
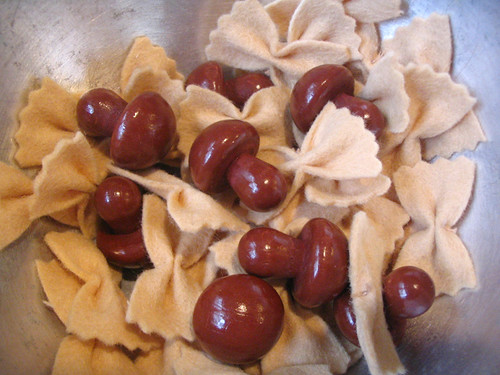
farfalle! this is Emily's favorite pasta shape (other than, say, pumpkins or penguins):

felt farfalle

farfalle with (Haba) mushrooms, ala Emily:

felt farfalle with mushrooms

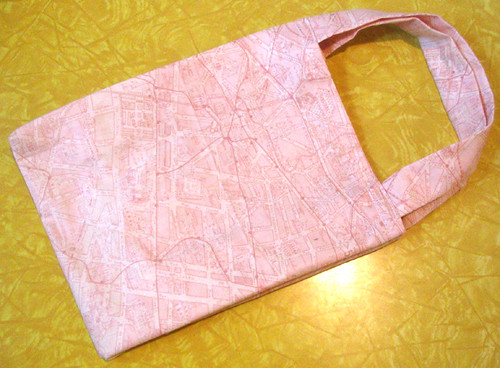
and the reusable shopping bags I made for her to keep all the food in:

her own shopping bags

I had a yard of this Paris street map fabric and had never found a good use for it. For some reason it struck me as perfect for shopping bags, I don't know why. In any case, cute and she loves them.

All the food was a huge hit, Emily has been making "stew" (her recipe includes bananas and a loaf of bread, and she laughs hysterically when we go "bananas?! bread?!") and pie and pasta with mushrooms ever since she opened everything. And I want to make more, more more! At least the felt cookies. So cute and easy!

Monday, December 11, 2006

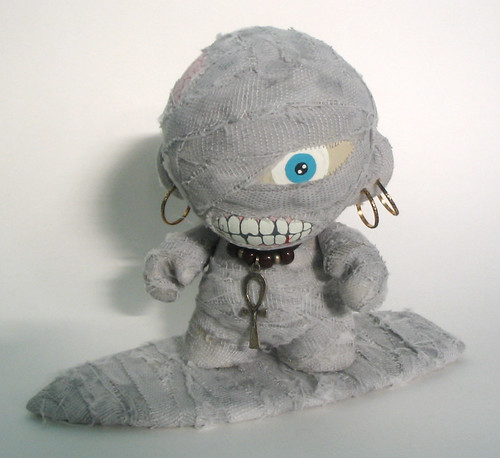
Surf Munny!

Surf Mummy munny (surfing)

We were asked to do a custom 8" Munny for the Uberbot Holiday Heroes charity auction, and he is done just barely in time! He's based on our Surf Mummy designer mini-mate from back in the day. And I think he's really cute. In a gruesome, living-dead sort of way. Surf Mummy will be up for auction in a few days to raise money for Toys for Tots, here's hoping he helps makes the holidays special for a bunch of little kids! More info at Evan's journal; more photos in Evan's flickrstream.

Saturday, May 20, 2006

this week's craftiness

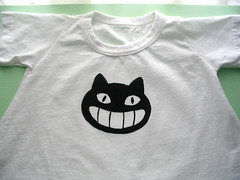
stencilled cat face shirt

Finally, I got the chance to try my hand at a freezer paper stencil; I'd been wanting to do it for a while since I definitely don't have time to mess with even the simplest screenprinting. This morning I made this swing shirt for Emily, and it came out really swell, we thought! The design is a little cat face from the credit sequence of Totoro. (See it bigger here!) It was pretty easy too -- I pencilled the design on the freezer paper (on the dull side), cut out the stencil with an x-acto, laid the pieces out on the shirt (shiny side down) and ironed them on. Then dabbed on some black fabric paint, peeled up the stencil pieces (the only really scary step), let the paint dry and heat-set it. I'm sure there's loads of tutorials but I basically followed the system I saw here (where I first saw this idea), especially Amy's brilliant step of adding freezer paper behind the stencil as well. I didn't let it dry overnight though -- I used the blow-dryer on it and heat set it so I could put everything back away as fast as possible. We're all excited to make more stencils!

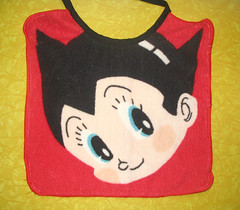
Also this week, a new washcloth bib, made from an Astroboy washcloth someone gave us years ago (I'm thinking it was our friend Devon but I'm not sure). I think Emily loves it way more than we do!

astro-bib!

Monday, October 31, 2005

tie one on - October!

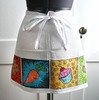
apron-oct-thumb.jpgThe theme for this month was mixed media and my apron is done! Update: Gallery is up!

I worked my way through a ton of plans on this one, unlike the other two. Originally, I wanted to do potato prints of kitcheny icons. But, I couldn't find fabric paint in the colors I wanted, and I couldn't find fabric I thought was suitable for making the actual apron. So I had just about resigned myself to not doing it at all.

But then, on the way back from the symposium at Duke, we stopped to get gas and found this huge thrift store (where I bought a bunch of cookbooks and some baby clothes for Emily) -- and in the linen section was the perfect dishtowel for making an apron! And amazingly. still clean and white (it was from a linen service, and the others were all stained) So I brought it home and did a quick-and-easy dishtowel apron. But then, what to put on it?

The potato prints were out, I had never found the colors I wanted. At first I thought of doing a comic (maybe of someone making a recipe or something) but I realized I'd never have the time to write it, much less draw it. Then I got the idea to do a mini-version of our House of Fun classic series "Life's Great Rewards" (these strips are pages of small panels, each containing iconic things we love. Evan and I have both done them.) but I couldn't settle on which things to draw. As I was trying to make a list in my head, I realized I was mostly thinking of food. And mostly, food that started with a "C"!

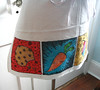
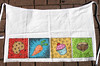
So, thus was born this month's apron, "C Is For...". Drawn freehand on a dishtowel apron in marker (panels ruled with a piece of junk mail) and colored in design markers.


Tie one on OctoberTie one on OctoberTie one on October
(photos link to larger images)


Related Posts Plugin for WordPress, Blogger...