Showing posts with label cooking. Show all posts

Thursday, March 29, 2012

Good Night, Mr. Scruggs, and thank you for the biscuits

We were sorry to hear the news that Earl Scruggs passed away yesterday; as a family we are big fans of Flatt & Scruggs and the Foggy Mountain Boys, as well as Scruggs on his own after the split. Emily had hoped he would hang on just a few years longer so she could hear him play live! She became a huge fan of the whole band when we started watching the Flatt & Scruggs show in Netflix last year. Here's a short clip of Earl in prime form:


The Flatt & Scruggs show (which was one early version of the Grand Old Opry, sponsored by Martha White Flour) is fantastic -- I'm not sure how much of it is actually available, but there are several volumes available on amazon, and the first 8 volumes are streaming on Netflix.


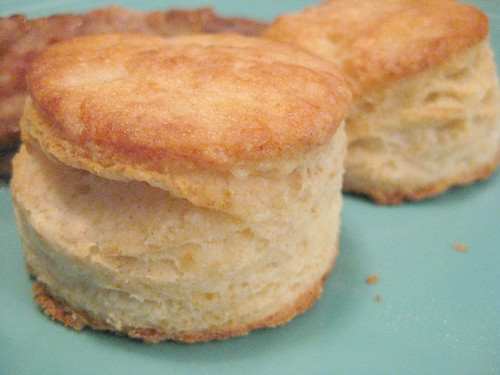
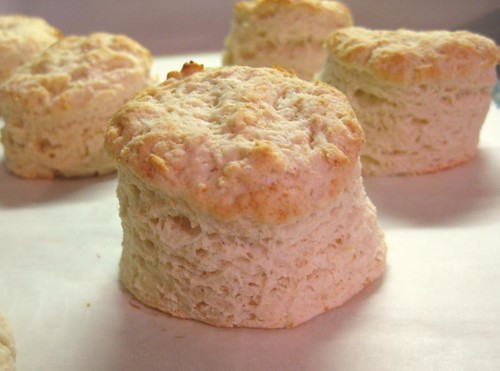
But to be honest, the biggest impact Earl Scruggs had on our household is in the kitchen. We heard that a biscuit recipe of his had been printed for many years by Martha White, and I finally tracked it down in their cookbook. We made it just for fun...but it actually is the best recipe I have ever used -- just look at the results!

Earl Scrugg's Biscuits

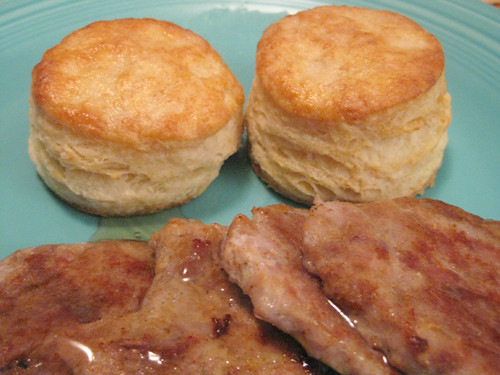
Biscuits are a regular feature on our table; sometimes as a side but honestly, most often as dinner (with sides of homemade sausage and a lot of honey and syrup.)

Earl Scrugg's Biscuits

The recipe has been replaced on their site with a new version that uses crisco and is now just called "famous" biscuits so here's how I make it:

Earl Scrugg's Famous Buttermilk Biscuits

First, melt 2 T of butter and set aside, and preheat oven to 450F

You will need 2 cups Self-Rising Flour OR
2 cups flour + 1 T baking powder + 3/4 t salt
To that add 1 t sugar and whisk (or pulse in a food processor)
Add 1/3 cup butter, chilled and cut up and either pulse in processor or cut in with pastry cutter until the mixture looks mealy.
Add 1 c buttermilk and stir in until it's shaggy looking. Turn dough out onto floured surface and knead until smooth (don't be afraid to sprinkle extra flour in there); roll out to 1/2" and then cut into rounds. Place on baking sheet and bake in oven for 12-15 minutes. When golden brown, remove and brush with melted butter. Put on some Foggy Mountain Boys and enjoy.

Sunday, March 13, 2011

yum yum yogurt

Here's a post that's been in draft mode for over a year...I even have had photos for it this whole time. (Which, ha ha, I can't seem to find. I did find a few but I know there were more. If I find them later I'll add them!) So sad! But after explaining how I make yogurt once again last week to friends I realized I really, really, needed to get this finished up so I could just send people here.


fresh yogurt
A big jar of fresh yogurt


A little back story: we eat a fair amount of yogurt around here. Emily has been eating it since she was tiny, and from the get-go I bought plain yogurt and added fruit purees instead of buying the commercial stuff. I found that I really needed to buy a better brand of yogurt, but getting those giant cartons was really adding up. I was super-intimidated by the idea of making my own yogurt since all the directions I had read involved either a lot of equipment, or an oven with a pilot light, or a system involving warm water and a cooler.....but then, I read the book Milk. It was a revelation, seriously. (I recommend it highly to anyone interested in dairy...the "white magic" experiments alone are worth the price of the book. And are the subject of yet another blog post that's sitting in draft mode.....) And her method for making yogurt? So easy. All you need is a candy thermometer, large pan, and wide-mouth thermal containers. No yogurt maker, no cooler, none of the other stuff I'd always seen called for in various methods.

I tried it, it worked, and I've made all our yogurt for about 2 years now. Here's how I do it (after some tweaking and experimenting). You will need: milk (I prefer whole milk), some starter yogurt (it can be anything as long as the cultures are live; I started mine with Stonyfield Farm plain), your candy thermometer, and at least one wide mouth thermal container (I use this Sky Thermal Food Carrier made by Imusa and available locally for about $8). Optionally, a large sieve and straining cloth if you want a thicker yogurt.
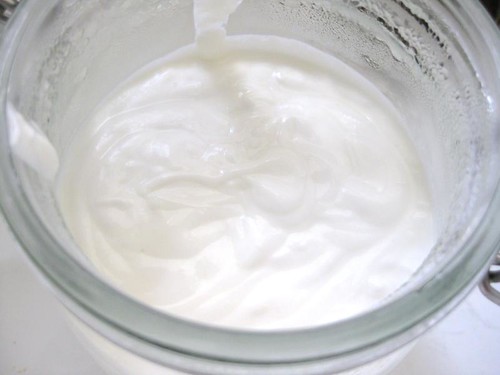

fresh yogurt
Yum!


Get started: clip your thermometer onto a saucepan, then pour in enough milk to fill the wide mouth container you will use -- 6 cups of milk will fill a 48 oz container and makes a decent size batch. I make twice that, but like I said, we eat a lot of yogurt. Turn the heat on low-med and heat the milk -- stirring occasionally -- until the temp reaches 180º. Note: if you, say, forget that you're making yogurt and lose track of time, your milk can go up to about 220º and it will still make perfectly good yogurt. It won't taste as fresh but you don't need to throw it out or anything. Not that I'm admitting that's happened to me....just saying.

Turn off the heat, and let the milk's temperature drop to about 120º. When it gets close, fill your thermal container with hot water and let it sit for at least 5 minutes. Get your starter yogurt out and put a few tablespoons into a small bowl (I use maybe 2 tablespoons per 6 c milk but my experience has been that you don't need to be too precise) and let that sit as well.

When the milk cools down to 120º, remove the thermometer and skim off any skin that may have formed, then ladle some milk into the bowl with the starter yogurt, whisking until ismooth. Add more milk if it's too thick. Pour the mixture back into the saucepan with the rest of the milk and stir. NOTE: do not let it go below 120º, this is the one mistake that will ruin the yogurt.

Empty the thermal container and wipe dry, pour milk mix into container and close it up. Let sit for 5-6 hours. Your timing my vary - you'll get a feel for how long it needs to sit based on your particular milk/yogurt/environment over time.

When it's time to check it, open the lid of the container and carefully use a spoon or spatula to just check the texture of the yogurt -- it should be like a soft custard. At this point you can either use it as it is -- just pot it up and refrigerate it, or for a smoother yogurt, pour it into a large bowl and stir before potting up. Or, at this point you can drain it for a "greek-style" yogurt. Which is what we do.

To drain it, I use a mesh strainer over my biggest stockpot, with an old (and very clean) tea towel lining the strainer. You can use fine cheesecloth, gauze, or even an old piece of cotton as long as it's clean and lint-free. Pour the yogurt into the strainer and cover (with a towel, or anything, just for dust -- I can sit the lid of the pot on top of the strainer, so I do that). You'll hear the whey start dripping right away! It takes 1-2 hours to drain, depending on your strainer and cloth -- I only need about an hour. You want about 2 cups of whey to come out of a 6 cup batch. Again, this doesn't need to be too precise. The longer you drain it, the thicker it gets, so try different draining times to see what you like best.


For MizK
Here's how thick I make my yogurt. Do you think I go overboard a little?


When it's ready, scrape it all into a large bowl and you can do two things -- if you want it to be very set, just mix it with a wooden spoon a few times to smooth it out. It will be very firm but it will have small lumps in it. If you want it to be very smooth, whisk it briefly. This will break the curd, so the final product will be looser, but very smooth. I do it the 2nd way.

Finally, just put it in the fridge and let cool! Then add whatever mix-ins you want. We add strawberry puree and peach puree for Emily; I mostly eat it with a little honey mixed in, or preserves (cloudberry jam yogurt is delicious!) This will last a lot longer than commercial yogurt -- I've never had mine go bad, just get more and more sour. Just remember that you need to save a little starter for your next batch.
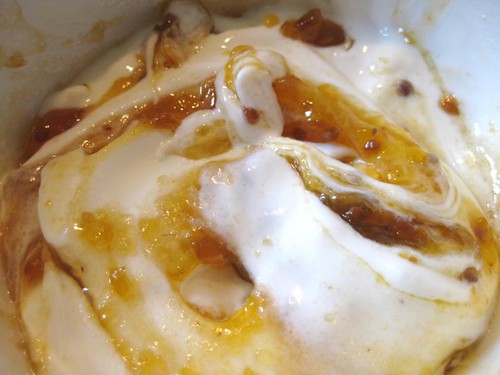

cloudberry yogurt
Cloudberries in my yogurt!


A few final notes:

I don't scald or sterilize anything. I haven't had anything weird happen, even the yogurt that has gotten left by accident has never grown anything, just gotten more and more sour.

I have successfully restarted my yogurt from a bit of frozen starter after travelling, so if you're going away just pop enough to start your next batch in the freezer.

If you use skim milk, you may need to add some dry milk to get it thick enough. I have never done this so I don't really know how it works. I'm all about the whole milk yogurt.

If you don't drink milk, you can use this method with soy milk! Check out these instructions from I Eat Food, which even tell you how to make the soy milk!

Saturday, December 4, 2010

dala horse cakes!

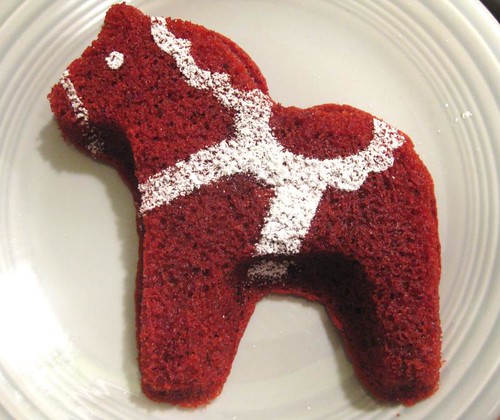
Like a lot of people I know, I bought those IKEA dala horse DRÖMMAR pans when they came out a while back, but I never actually used them. Yesterday, I saw this adorable stocking design on the allsorts blog, and thought "aha! I'll decorate the cakes like that! And make the red and white with red velvet cake batter and powdered sugar!" And voila, red velvet dala horses:

red velvet dala horses

That's the little one, the big one is here. He's not as cute because he baked longer and isn't so red. But still, cute xmas dala cake!
The pans really are non-stick, I was impressed. I may have to get more bakeware from IKEA in the future. The design I made by cutting a stencil from typing paper based on the allsorts dala horse, putting it right on the cake (not reusable, obviously!) and sprinkling the sugar over it. Emily looooves them, and I think they will be reappearing all this month.
I only wish they had a set of little pans to make lots of individual horses!

Sunday, October 10, 2010

tomato bread

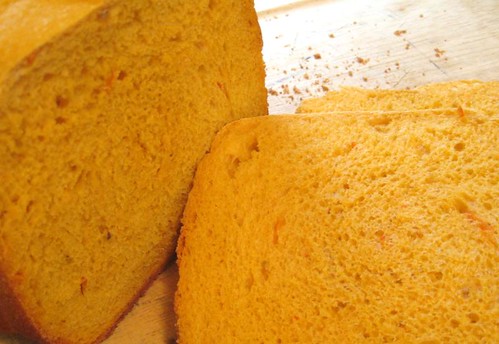
I had more of the windfall tomatoes than I could use fresh, so I pureed the remainder and made tomato bread!

tomato bread!

How pretty is that? All I did was substitute the puree for the water my regular recipe calls for. (I subbed 12 oz of puree for 9 oz of water -- it was a lucky guess!) Emily hated it though...and it wasn't good for morning toast with jam. But it made fantastic sandwiches:

tomato bread sandwich

It wasn't quite that bright in person. But it was really good. Definitely something I want to experiment with more, but I might not inflict it on Emily's regular loaf next time!

Monday, September 20, 2010

windfall tomatoes


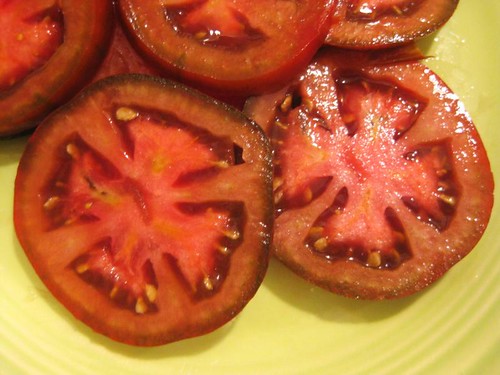
heirloom tomatoes, about to become salad

Aren't those lovely? The recent tornado storm craziness we had here in NYC knocked a load of heirloom tomatoes off our friends' vines, and we got a small bag -- no idea what these guys are, but after adding some olive oil, basil and pecorino they were delicious. I've got a big one of these that's begging to be sliced up tonight!


Sunday, August 22, 2010

the fairy ring

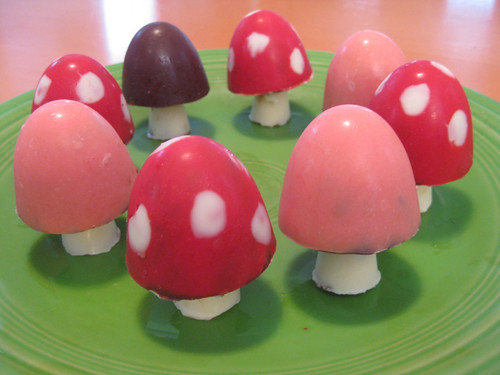
I finally dug out the molds and chocolate I had bought a while back to make these adorable chocolate mushrooms. Emily and I tried our hand at making them and here is our result!

chocolate mushrooms


It was our very first time making molded candies, and I was surprised that they came out looking at decent as they did. We definitely learned a lot...the colored chocolate (white, red and pink) was brushed into the molds first, then a nice thick layer of dark chocolate was put in. We filled them with strawberry-laced buttercream I had leftover and then assembled them.

chocolate mushrooms


Definitely not professional looking, but pretty cute. Unfortunately....they were unbearably sweet! None of us could get through more than about half of one and we have had no desire to repeat the experience. I think they'll be getting thrown out tonight. I might try them again, but fill them with something (relatively) lighter, like marshmallow fluff. But I think it'll be a while. They were fun to make, though, and we'll definitely be trying more molded chocolate one of these days! Just.....not so big. And not full of frosting.


Thursday, March 18, 2010

what we found at the end of the rainbow (cake)


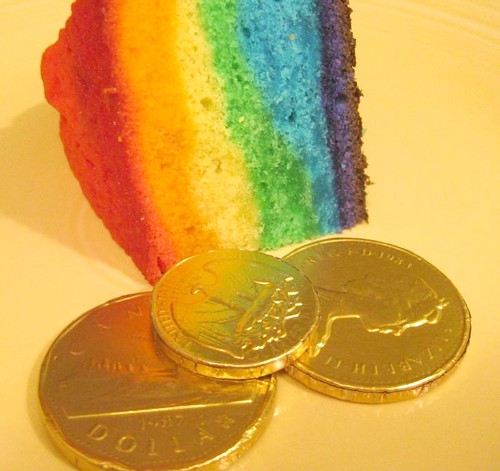
gold at the end of the rainbow cake


Gold! We didn't end up doing much for St Patrick's day this year, but Emily was more than satisfied to help me make rainbow cake. Then we surprised her by adding the "gold" when we had it for dessert. I love it when a plan comes together!

Saturday, March 13, 2010

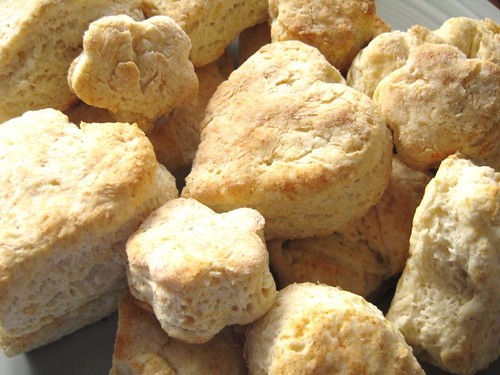
biscuit day!

biscuit day!


2 developments since we started making the biscuits:
first, every Saturday is Biscuit Day. Emily is very firm on this point.
second, as it turns out, heart shapes are far more efficient than the traditional circle when cutting out. And cute! Win-win!


Sunday, February 28, 2010

Cooking with Cartoonists: Tuna Fish Wiggle

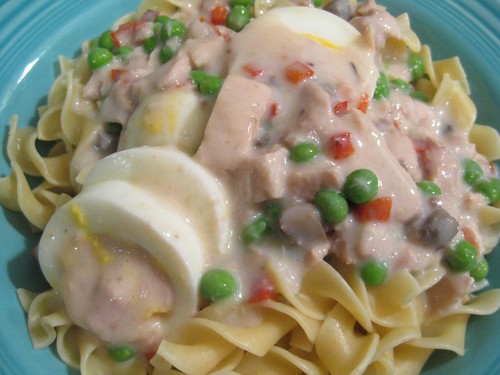
Dik Browne's Tuna Fish Wiggle.

Dik Browne's Tuna Fish Wiggle

Do you really want this recipe? Really? Well, if you still do after seeing that photo, just google it. Dik Browne (of Hagar the Horrible and Hi & Lois fame) claimed his wife invented this dish in the early 40s while trying to make chicken-a-la-king on a budget, but it seems to be a pretty well-known recipe (often served over toast). Basically, it's an unbaked tuna casserole, with the sauce poured over the noodles instead of mixed in. I used fresh ingredients instead of canned, but even so....I think baking might have improved it. It was edible, at least (although Emily said it was disgusting and picked at the noodles). But I'm not sure I can believe that his family still was eating this regularly after he became successful!

He did offer up a menu that doesn't include Tuna Fish Wiggle:


Cocktails with Miniature Meat Balls in Jelly Sauce

Boeuf Bourguignon

Green Noodles

Tossed Salad

Fruit Bombe

Coffee


But the recipes included were either nixed in our vote (green noodles) or too complicated for a small family dinner. I wish I'd overruled them and gone for the green noodles! Next cartoonist, please!

The Cartoonist Cookbook is a book put together in 1966 by the Newspaper Comics Council, featuring 45 popular strip cartoonists of the 60s, with bios, art and recipes. It's a fun thing to have if you like cartooning, but I somehow never got around to actually cooking from it. This year, I decided to work my way through it and try and do at least one recipe from each artist!

Sunday, February 21, 2010

Cooking with Cartoonists: Blueberry "Muffins"

Time for another recipe from The Cartoonist Cookbook! Artist #2 is Dick Brooks, who based his strip, "The Jackson Twins" on his own twin sisters. I hope they didn't mind!
His dinner menu was pretty impressive -- just reading it made me feel sleepy:


New England Clam Chowder

Steamed Clams

Boiled Lobster

Corn on the Cob

Cape Ann Blueberry "Muffins"

Fresh Strawberry Shortcake

Chablis


(This menu is followed by instructions to go out back, lay in your rope hammock, and sleep for three hours after dinner!) Now, once again that's a meal I can't argue with. It's also a meal that would overwhelm our small household. I was intrigued by the quote marks around the "muffins" and everyone here likes baked goods, so it seems like the natural choice. And as it turns out, the reason they're "muffins" and not just muffins is because...they're not muffins. It's a coffeecake! But in our house there is no coffee...so let's just call it cake.

Dick Brook's Blueberry Cake:
2½ c sugar
1 c butter, softened
3 eggs
1 c milk
5 t baking powder (yes, 5!)
1 t salt
5 c flour
1½ pints blueberries (this is 3 cups, or about 145 grams)
sugar
cinnamon

Preheat oven to 350°. Sift flour, salt and baking powder into a small bowl and set aside. Cream sugar and butter, adding eggs one at a time. Add milk, then add flour mixture slowly and beat until blended. Stir in blueberries and then spread into a 10½ x 15½ x 2 inch pan and sprinkle cinnamon and sugar on top. Bake for 1 hour, testing for done-ness before removing. I used that big chunky sugar -- sanding sugar? But regular sugar would work fine.

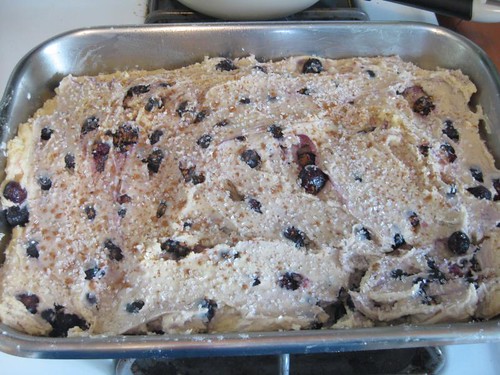
Now, I don't know what kind of crazy pans Dick had, but I had nothing close. I ended up using a 9 x 14 pan. The batter seemed awfully stiff as I spread it into the pan:

Dick Brook's Blueberry Cake

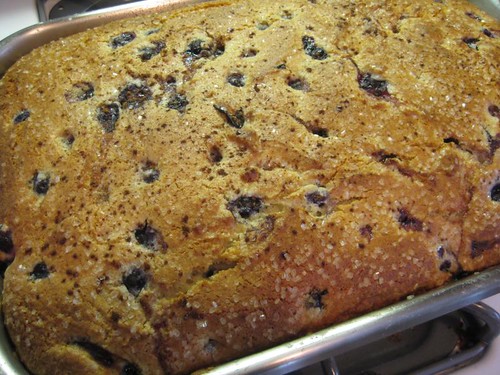
I was worried that it would be too dense. But, it baked up amazingly!

Dick Brook's Blueberry Cake

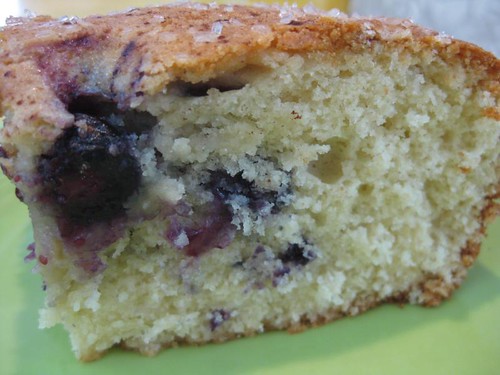
Unfortunately, I did not test for doneness, because the edges were so brown I thought it had to be done. An hour later, the center had totally collapsed and I had to dig the partially cooked center out and throw it away. Boo! Next time I will try two small pans and I will check it before taking it out. Fortunately, the parts that were fine were delicious:

Dick Brook's Blueberry Cake

In the words of the five-year-old, "YUM YUM YUM!". I will definitely be making this one again!

The Cartoonist Cookbook is a book put together in 1966 by the Newspaper Comics Council, featuring 45 popular strip cartoonists of the 60s, with bios, art and recipes. It's a fun thing to have if you like cartooning, but I somehow never got around to actually cooking from it. This year, I decided to work my way through it and try and do at least one recipe from each artist!

Monday, February 15, 2010

cookies of love

candy-filled cookies


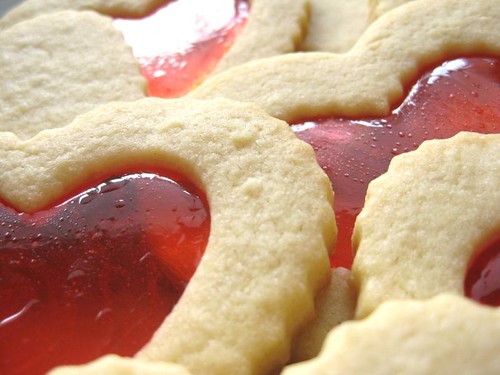
We made these cookies for Valentine's Day -- originally we were going to make them last week and send them out, but then that whole blizzard thing happened and quashed that idea. So we waited and just made them for ourselves this weekend. The idea and the cookie dough recipe came from an old clipping I'd saved from Family Fun magazine -- but instead of melting jolly ranchers in the centers, we baked the cookies, then poured our own hard candy (using the lollipop recipe) into the middles.

candy-filled cookies


It worked out beautifully! The cookie dough kept its shape and the candy was easy to handle.

candy-filled cookies

I don't think we'll be able to eat them all though! Definitely a recipe for gift-giving.

We had a good day, although having two holidays your 5-year-old likes on a single day is a bit rough (Chinese/Lunar New Year was yesterday as well -- we did Valentine's for the first half of the day, New Year's for the 2nd)...it all came out fine though!

And finally I just have to show off the lovely necklace I got for Valentine's Day (which would look much better with something other than an oversized t-shirt, but I wore it all day anyway)!

skull necklace


Hope your Valentine's Day was sweet and happy! (And let's not forget, Gung Hay Fat Choy! Welcome, year of the Tiger!)

Friday, February 12, 2010

Cooking with Cartoonists: Light Chocolate Cake

Many years ago, I bought a copy of The Cartoonist Cookbook, a book put together in 1966 by the Newspaper Comics Council, featuring 45 popular strip cartoonists of the 60s, with bios, art and recipes. It's a fun thing to have if you like cartooning, but I somehow never got around to actually cooking from it. This year, I decided to work my way through it and try and do at least one recipe from each artist!

Going alphabetically, my first artist (I'm skipping Neal Adams) is Alfred Andriola, who drew crime comic Kerry Drake for decades. He apparently lived a pretty happy bachelor lifestyle in Greenwich Village and gives us a nice date-night-back-at-the-bachelor-pad menu (he even gives you music suggestions based on your dinner companion's hair -- Sabrica's Flamenco for brunettes; Strauss' Salome for blondes). The whole dinner?


Prosciutto and Melon

(he says you should only buy prosciutto in a good Italian market)

Filet of Chicken Kiev

Spinach (or corn) souffle

Tomato Salad

Light Chocolate Cake

Coffee


It all sounds good, but our pick was (shocking!) the dessert, which came out wonderfully (and lasted us 2 days, so about 6 servings). Behold:

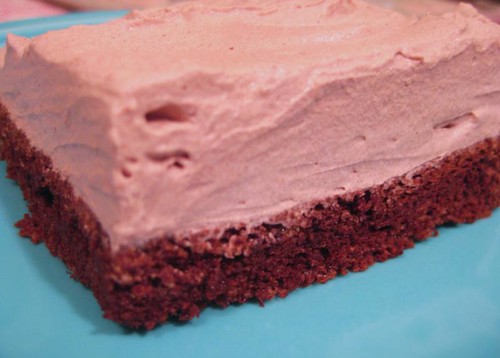
andriola's cake


The cake layer there is shorter than it should be, my pan was too wide. (You really need to use an 8x8 for this one.) Basically, it's a flourless sponge cake, topped with a chocolate whipped cream. And amazingly good. Surprisingly, I couldn't find any cake recipes online that were like this -- they were all either only technically flourless (they used matzo meal or something like that) or they were very dense. Here's how Alfred makes it (note, I skipped both the almond extract in the cake, and the chopped almonds on the topping as no-one here likes almonds but me):

Cake:
3 eggs, separated
5 T sugar
3 T cocoa
1 t vanilla
½ t almond extract
½ t cinnamon

Preheat oven to 350° . Whisk egg yolks, adding sugar gradually and then continue whisking until creamy. Add cocoa, extract and cinnamon and whisk until smooth. Beat egg whites (in a stand mixer!) until they form stiff peaks, and then fold gently into chocolatey mixture. Pour into 8" x 8" pan, lined with parchment or waxed paper and then greased and floured. Bake for 25 minutes. Let cool before removing from pan and peeling off paper.

Topping:
1½ c heavy cream
¼ c sugar
2 T cocoa
½ t vanilla
Mix all ingredients together and chill for at least an hour (I put them all into a covered container, shook hard, and then put in the fridge for probably 4-5 hours. You can do this up to a day ahead, I'd think.) Whip until firm, and spread over cooled cake. Optionally, sprinkle with chopped almonds.

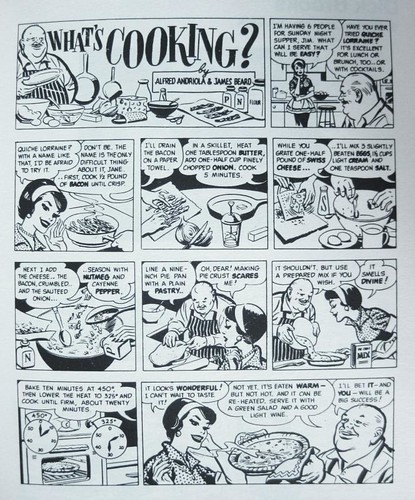
Bonus!! Alfred was neighbors and pals with James Beard, and the two of them collaborated on what must be James Beard's only comics credit:

"What's Cooking" 1966 comic


Sunday, January 24, 2010

best biscuits ever

And possibly the easiest, too. If you have a food processor, that is. Emily and I had ours with butter and honey, Evan went for straight butter. Thumbs up from everyone!

biscuits


Seriously, I have never tried a biscuit recipe that grew so tall in the oven! Try these for yourself! Recipe here.

Friday, January 22, 2010

wasabi adventure

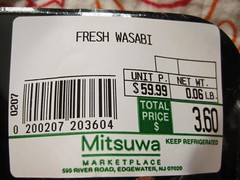
Over the holidays, we made our Xmas eve trip to Mitsuwa to pick up our Xmas Cake, and while browsing around the section of special fancy stuff for gifts, we found a display of real wasabi. Not the fake stuff you get in restaurants (which is mustard, horseradish and green color) but the actual root. I was excited to see it, and then flabbergasted by the price:

fresh wasabi

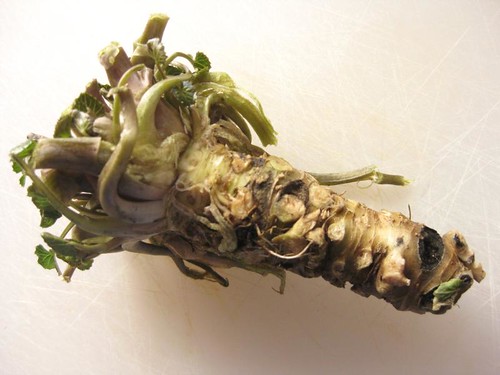
Yup, that's $59.99 per pound. Luckily, a little root doesn't weigh much! So we brought the tiniest one home.

fresh wasabi

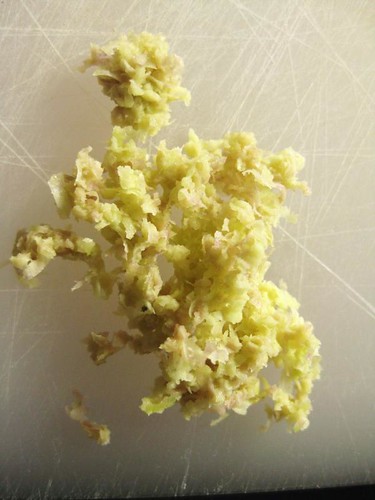
I didn't have the proper grater (I used my trusty basic microplane) and we weren't even going to have sushi in the house while it lasted. But I wanted to see for myself what it was like.

fresh wasabi

And it really is nothing like the faux wasabi I've had all my life. It's hard to explain, but unlike the horseradish version, the heat dissipates really fast. And it doesn't go to your sinuses at all. At least in comparison. I do not love wasabi paste, but I really liked this! I couldn't just keep eating little pinches of it though, so I made a bowl of wasabi mayo out of it and we had it on sandwiches for a few days. Delicious, and definitely a worthwhile experiment!

Friday, November 20, 2009

the panda is back!

Remember the awesome Fry Pan-da that Fred Flare had a year or so ago? (Which, I can testify is actually a pretty awesome pan in daily use.) Well, they've got a Baby Pan-da in stock just in time for the holidays:

minipanda.jpg


Much smaller, just 7" so not as useful. But just as cute! And yes, one is already stashed away in our house for Emily. So, everyone who's been wanting a Pan-da of their very own - now's your chance!


Monday, August 17, 2009

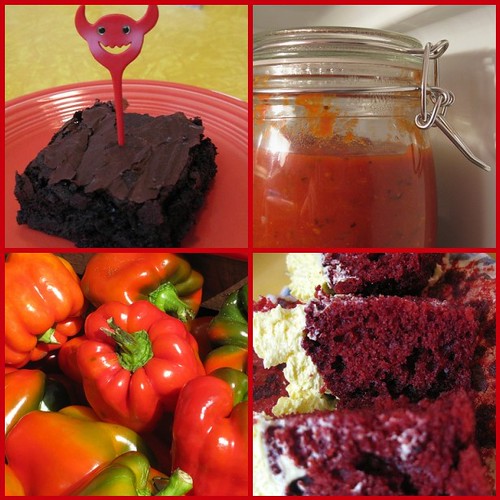
eye spy...something red

eye spy...red

Funny...it's all about the food, apparently! We must have some red things around this house...but food is what comes to mind first.

This week's eye spy theme brought to you by Ellieboo!

Saturday, May 16, 2009

brownies!

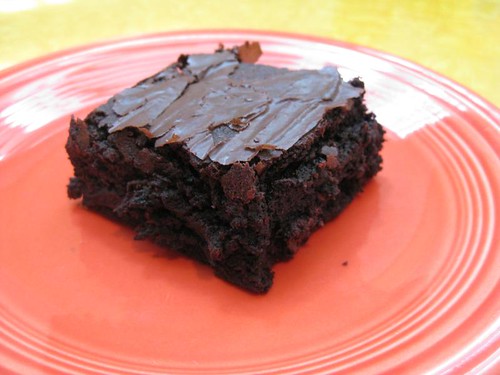
We have been in search of the perfect brownie recipe for our hosuehold (that would make everyone happy) and nothing has ever really worked out. Until now:

best brownies ever

Want a closer look? Zoom into the chocolateyness here! This is a recipe I found on the King Arthur blog, it's actually a recipe they've published for years, apparently, but this blog post gives you a step-by-step along with some tweaks. I followed the blog post (although I erred and followed the amounts in the original recipe) and the results were amazing. Most importantly, they are still great a day later -- I find that practically any brownie is awesome still warm, but a day later, meh. Not these, they are still going strong. (The next test will be to see how they handle freezing -- since it makes 24 brownies! I froze half and we'll see how that goes.)

Next time, I'll probably use plain dutch cocoa, the addition of the black cocoa wasn't necessary I think. And I added the chips immediately instead of waiting -- and there are still visible chunks of chocolate in the brownies, not quite as much as on their blog but plenty for me. Of course, I will have to actually get more dutch cocoa as I forgot I was almost out when I placed my recent order! And can't afford shipping for one item so.....it may be a while before we have these again. Sigh.

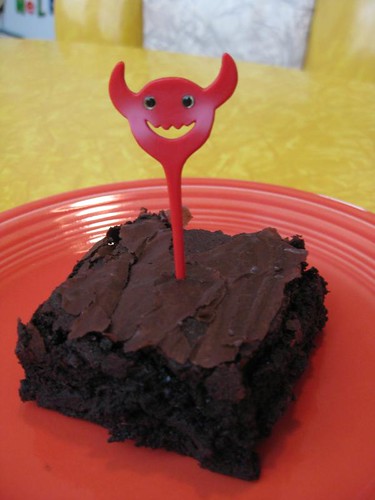
Oh, and Evan says they are better this way:

even he approves

Now go fix yourself some brownies!

Tuesday, May 5, 2009

what we've been eating...

in all this gloom (a week of rain we're having. and I mean raiiiiin).

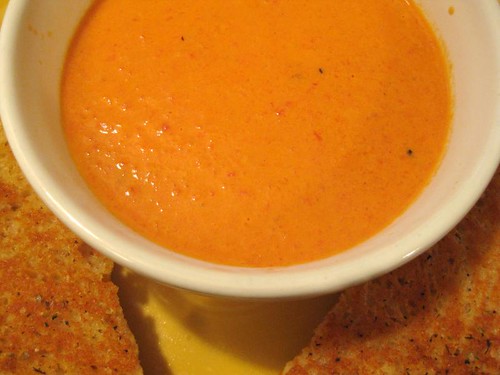
Soup and sandwiches!

soup and sammich

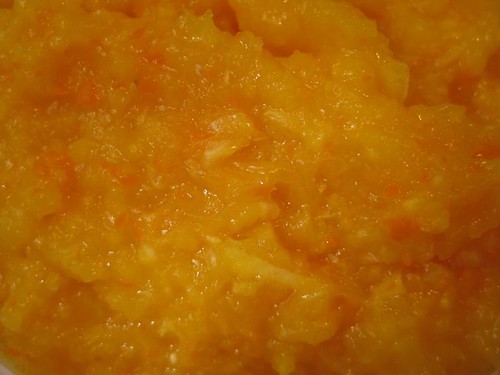
some bright and happy orange muffins made with this pulped navel orange:

orange pulp

(I did not make the topping, just made them plain. I was leery of pulping the whole orange, but it really is good.)

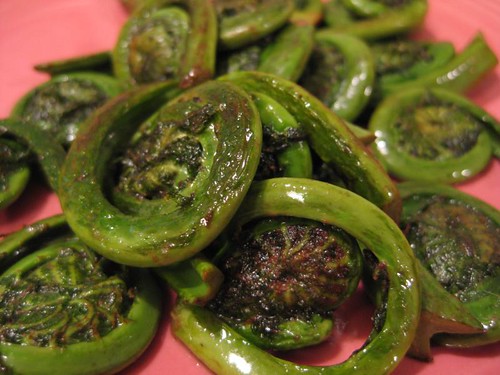
and for fun, fiddleheads!! They showed up in our Stop & Shop and I grabbed a bunch. They were as good as everyone says they are (sort of asparagusy). I'll definitely grab them again when I have the chance.

fiddleheads

And of course, cupcakes! But more about those later.

What have you been eating?


Wednesday, March 25, 2009

winter's last hurrah

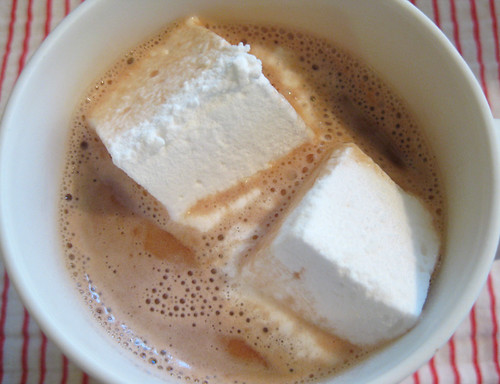
hot chocolate

There is our last mug of hot chocolate (unless we get some crazy weather!) for the season...and the ultimate mug-full! After a few years of trying various homemade hot cocoa recipes with no success (I mean, they all made hot cocoa, but none of us really liked any of the results) I finally discovered the secret. Don't mess with cocoa! Go for the chocolate....it's so simple, but so much better. Why I never thought of it (and why everyone keeps pushing the cocoa) I do not know. Here's how we like it:

For each mug, put 1 cup of a rich whole milk into a small saucepan (got so-so whole milk? make your cup up out of 2 ounces of cream and 6 ounces of whole milk) and heat until just bubbling. In a larger saucepan, put 1 tablespoon of water and 35 grams of a decent milk chocolate and melt together over low heat. Add heated milk and stir until smooth. Dark chocolate would probably be good too, but milk chocolate works for us. (I use the 99 cent bars from ikea, you need 1/3 of a bar per mug.)

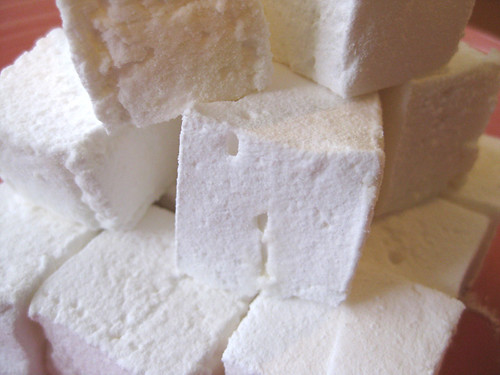
And to top your chocolate? Homemade marshamallows!

freshly cut marshmallows

I have wanted to try making marshmallows for years, and only now finally got around to trying it. So easy -- if you have a candy thermometer, a stand mixer, and the patience to leave the pan of marshmallow along overnight. I used the Alton Brown recipe and they are ridiculously good. (Vegetarians -- from what I have read online, you can sub 1 T of agar-agar for each packet of gelatine.) We'll definitely be trying flavored ones in the future.

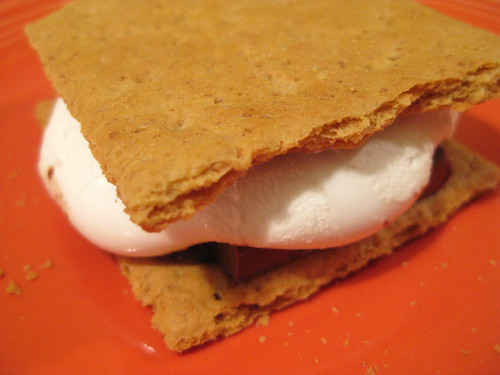
And they melt amazingly, witness the result in Emily's favorite dessert, Pixie's Delights (basically, baked s'mores, from a vintage kid's cookbook we have).

pixies' delight

I cannot wait to toast these! And....while I can wait for next winter, when it does come back around I will be well-prepared.

Monday, February 16, 2009

happy valentine's day (weekend)!

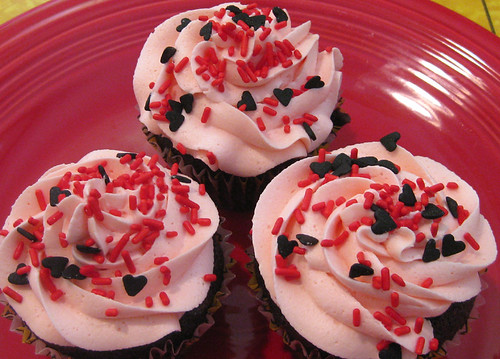
happy valentine's day!

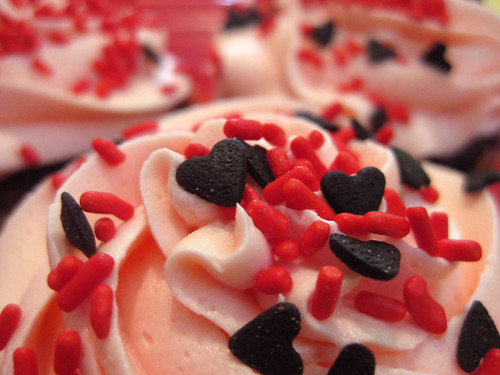
Hope you all had a good weekend, Valentine-y or not. We had fun, lots of valentine's and these cupcakes. Emily found the sprinkles at Target and loved them, so she and I made cupcakes Saturday! I have to admit, I don't love the recipe I used (I don't make cupcakes that often, so I haven't been able to try many recipes, and so far none of them are keepers). It's for chocolate-banana cake and while it sounded good in theory, not so great in practice. Really I should have remembered that I have a red velvet recipe stashed somewhere I've been meaning to try -- that would have looked perfect!

Well, there are a lot of sprinkles left, so....more sweetie cupcakes soon, I think!

happy valentine's day!

Related Posts Plugin for WordPress, Blogger...