 |
| How cute is this 1950s Junior Troop? From a gallery of Life Magazine photos by Edward Clark. |

Monday, March 12, 2012
Happy 100th Birthday!
Saturday, March 10, 2012
Happy Girl's and Ghoul's Day!
March 3rd is Girl's Day in Japan, and we've celebrated it every year since Emily was born, usually by going to Mitsuwa in NJ and having lots of food and fun. This year we had a special guest girl to celebrate with us (and we let our boys come as well) and I think it was the best one yet -- in no small part because we also celebrated Ghoul's Day that evening! Girl's Day is also the Doll Festival and all three of us are huge Monster High fans -- so Emily had the idea to have a spooky doll-related party as a surprise for everyone. We made everything a day or two ahead of time and hid it, and after resting up from our day out on the 3rd we had some spooky fun. The highlight, of course, was the food:
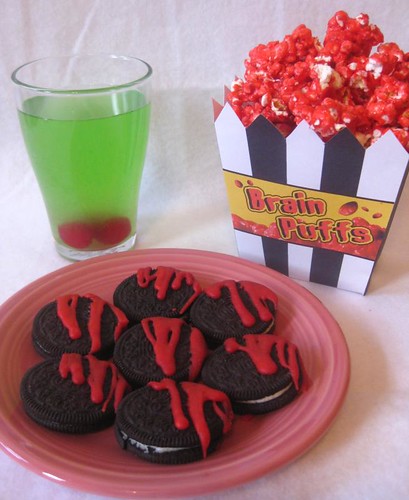 |
| Ghoul's Day party food! |
We made the official drink of Monster High, Ghoulia's Ghoul Juice -- it's a recipe you can win on the website by playing a game (or just look up online). Looking at the directions, I realized it was just lemonade with food coloring added, and a bit of baking soda thrown in for fizz. So I just used our normal lemonade recipe and colored it bright green. No gummy eyeballs were to be found in March, so we just used maraschino cherries -- and skipped the fizzy baking soda part.
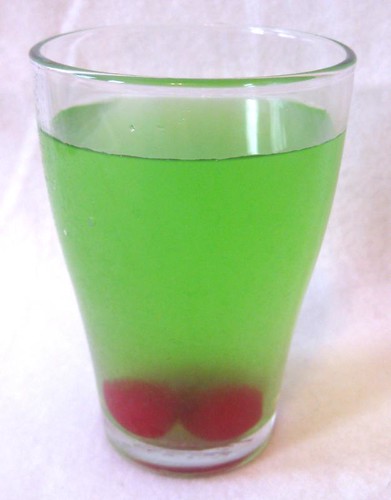 |
| Ghoulia's Ghoul Juice (a.k.a. bright green lemonade) |
Bloody Oreos were next on our list -- originally I meant to use some leftover red candy melts, but they never really melted (and to be honest, I think that stuff is gross). We were almost out of time but I found a recipe for a glaze that worked perfectly (1/3 c butter, 2 c powdered sugar, 2 t vanilla and 2-4 t hot water -- melt butter, add everything else and whisk until smooth). We colored it bright red and drizzled it on our cookies and came up with this:
Seriously cool, and tasty as well! But the coolest looking snack had to be our Brain Puffs, based on a snack that the zombie girl, Ghoulia, has in her slumber party version. Emily thinks that popcorn looks a lot like brains, and I vaguely remembered saving a clipping from a 1960s magazine for making colored popcorn. I never did find the clipping, but luckily I remembered jello was involved and it turns out jello popcorn is a well known classic snack. I used cherry jello and this recipe, made human-sized boxes and we filled them with our Brain Puffs!
I have to admit, the candied popcorn was a little sweet for us. It does keep well, but with a box of bloody oreos in the house to go for instead it didn't really have a chance. And without the box, the spookiness is pretty much lost. But the bloody oreos and ghoul juice will definitely be coming back for Halloween!
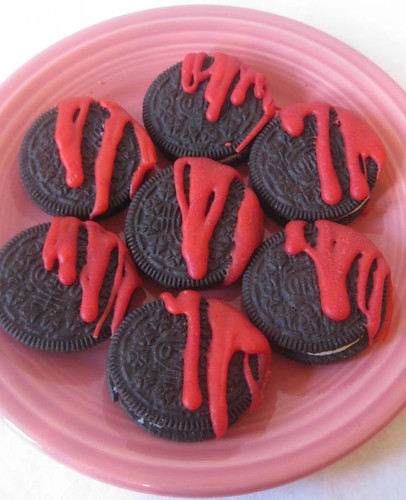 |
| oreos dripping with vanilla sugar blood |
 |
| BRAAAAAIIIIIIINS!!!! |
whoah, nellie!
Alright, the rss feeds have automatically switched....unfortunately they marked the last 25 posts as new and dumped them in Reader for me so I assume you all got them too. Sorry about that! First actual new post coming up....
Wednesday, March 7, 2012
well, hey there!
I'm in the process of transferring/merging my old movable type blog to a shiny new blogger version of itself. The blogger version is here for now, but shortly will be found at www.colorkitten.com. Well shortly as in, in a day or two. I think the feeds will move to the ones you see in the sidebar right now, but I'm not 100% sure. Hopefully this will make it possible for me to blog again, because wrangling with the old MT installation had just become more than I could bear. Sit tight, and see you here/there soon!
Tuesday, May 17, 2011
go west, young gal!!
I've got a new blog, and you're welcome to stop by and visit!

Now I know what you're thinking - you're thinking "You don't blog over here, why on earth would you start a new blog?" Well, a lot of reasons. But basically, I have no time to do the kind of blog posts I want to do here -- and I have been wanting to write up some of the cool stuff we've been watching/reading/listening to which just doesn't seem to fit in on this blog. Plus, I'm sick of wrangling with Movable Type (my blogging software) but don't have a weekend to upgrade or switch.
So, I've started a little Western-themed blog over in my blogger account. What will you find there? Well, whatever catches my fancy - videos, books, etc. But one of the main reasons I've started the blog is to chronicle our adventures watching every Gene Autry movie. In order! This blog is not dead, and hopefully someday I'll have free time again in stretches that last more than 5 minutes and I'll post all the things I have photos filed away for. (In fact, I have something to post about right now! "Right now" meaning this week, that is..) But in the meantime, I'll be scratching the blogging itch with some quick and fun posts on the new blog.
Anyway, I hope you'll come on over and say hi! See you there!
Now I know what you're thinking - you're thinking "You don't blog over here, why on earth would you start a new blog?" Well, a lot of reasons. But basically, I have no time to do the kind of blog posts I want to do here -- and I have been wanting to write up some of the cool stuff we've been watching/reading/listening to which just doesn't seem to fit in on this blog. Plus, I'm sick of wrangling with Movable Type (my blogging software) but don't have a weekend to upgrade or switch.
So, I've started a little Western-themed blog over in my blogger account. What will you find there? Well, whatever catches my fancy - videos, books, etc. But one of the main reasons I've started the blog is to chronicle our adventures watching every Gene Autry movie. In order! This blog is not dead, and hopefully someday I'll have free time again in stretches that last more than 5 minutes and I'll post all the things I have photos filed away for. (In fact, I have something to post about right now! "Right now" meaning this week, that is..) But in the meantime, I'll be scratching the blogging itch with some quick and fun posts on the new blog.
Anyway, I hope you'll come on over and say hi! See you there!
Sunday, March 13, 2011
yum yum yogurt
Here's a post that's been in draft mode for over a year...I even have had photos for it this whole time. (Which, ha ha, I can't seem to find. I did find a few but I know there were more. If I find them later I'll add them!) So sad! But after explaining how I make yogurt once again last week to friends I realized I really, really, needed to get this finished up so I could just send people here.

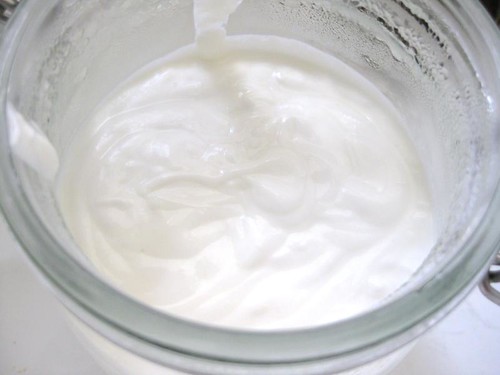
A big jar of fresh yogurt
A little back story: we eat a fair amount of yogurt around here. Emily has been eating it since she was tiny, and from the get-go I bought plain yogurt and added fruit purees instead of buying the commercial stuff. I found that I really needed to buy a better brand of yogurt, but getting those giant cartons was really adding up. I was super-intimidated by the idea of making my own yogurt since all the directions I had read involved either a lot of equipment, or an oven with a pilot light, or a system involving warm water and a cooler.....but then, I read the book Milk . It was a revelation, seriously. (I recommend it highly to anyone interested in dairy...the "white magic" experiments alone are worth the price of the book. And are the subject of yet another blog post that's sitting in draft mode.....) And her method for making yogurt? So easy. All you need is a candy thermometer, large pan, and wide-mouth thermal containers. No yogurt maker, no cooler, none of the other stuff I'd always seen called for in various methods.
I tried it, it worked, and I've made all our yogurt for about 2 years now. Here's how I do it (after some tweaking and experimenting). You will need: milk (I prefer whole milk), some starter yogurt (it can be anything as long as the cultures are live; I started mine with Stonyfield Farm plain), your candy thermometer , and at least one wide mouth thermal container (I use this Sky Thermal Food Carrier
 made by Imusa and available locally for about $8). Optionally, a large sieve and straining cloth if you want a thicker yogurt.
Yum!
Get started: clip your thermometer onto a saucepan, then pour in enough milk to fill the wide mouth container you will use -- 6 cups of milk will fill a 48 oz container and makes a decent size batch. I make twice that, but like I said, we eat a lot of yogurt. Turn the heat on low-med and heat the milk -- stirring occasionally -- until the temp reaches 180º. Note: if you, say, forget that you're making yogurt and lose track of time, your milk can go up to about 220º and it will still make perfectly good yogurt. It won't taste as fresh but you don't need to throw it out or anything. Not that I'm admitting that's happened to me....just saying.
Turn off the heat, and let the milk's temperature drop to about 120º. When it gets close, fill your thermal container with hot water and let it sit for at least 5 minutes. Get your starter yogurt out and put a few tablespoons into a small bowl (I use maybe 2 tablespoons per 6 c milk but my experience has been that you don't need to be too precise) and let that sit as well.
When the milk cools down to 120º, remove the thermometer and skim off any skin that may have formed, then ladle some milk into the bowl with the starter yogurt, whisking until ismooth. Add more milk if it's too thick. Pour the mixture back into the saucepan with the rest of the milk and stir. NOTE: do not let it go below 120º, this is the one mistake that will ruin the yogurt.
Empty the thermal container and wipe dry, pour milk mix into container and close it up. Let sit for 5-6 hours. Your timing my vary - you'll get a feel for how long it needs to sit based on your particular milk/yogurt/environment over time.
When it's time to check it, open the lid of the container and carefully use a spoon or spatula to just check the texture of the yogurt -- it should be like a soft custard. At this point you can either use it as it is -- just pot it up and refrigerate it, or for a smoother yogurt, pour it into a large bowl and stir before potting up. Or, at this point you can drain it for a "greek-style" yogurt. Which is what we do.
To drain it, I use a mesh strainer over my biggest stockpot, with an old (and very clean) tea towel lining the strainer. You can use fine cheesecloth, gauze, or even an old piece of cotton as long as it's clean and lint-free. Pour the yogurt into the strainer and cover (with a towel, or anything, just for dust -- I can sit the lid of the pot on top of the strainer, so I do that). You'll hear the whey start dripping right away! It takes 1-2 hours to drain, depending on your strainer and cloth -- I only need about an hour. You want about 2 cups of whey to come out of a 6 cup batch. Again, this doesn't need to be too precise. The longer you drain it, the thicker it gets, so try different draining times to see what you like best.

Here's how thick I make my yogurt. Do you think I go overboard a little?
When it's ready, scrape it all into a large bowl and you can do two things -- if you want it to be very set, just mix it with a wooden spoon a few times to smooth it out. It will be very firm but it will have small lumps in it. If you want it to be very smooth, whisk it briefly. This will break the curd, so the final product will be looser, but very smooth. I do it the 2nd way.
Finally, just put it in the fridge and let cool! Then add whatever mix-ins you want. We add strawberry puree and peach puree for Emily; I mostly eat it with a little honey mixed in, or preserves (cloudberry jam yogurt is delicious!) This will last a lot longer than commercial yogurt -- I've never had mine go bad, just get more and more sour. Just remember that you need to save a little starter for your next batch.
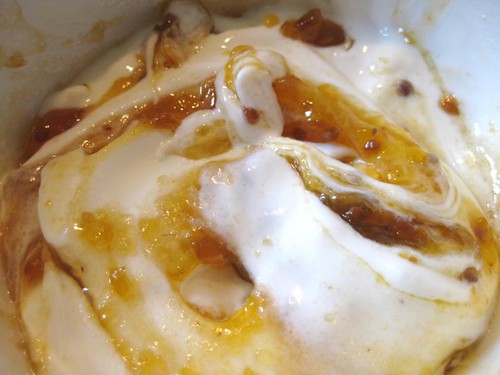
Cloudberries in my yogurt!
A few final notes:
I don't scald or sterilize anything. I haven't had anything weird happen, even the yogurt that has gotten left by accident has never grown anything, just gotten more and more sour.
I have successfully restarted my yogurt from a bit of frozen starter after travelling, so if you're going away just pop enough to start your next batch in the freezer.
If you use skim milk, you may need to add some dry milk to get it thick enough. I have never done this so I don't really know how it works. I'm all about the whole milk yogurt.
If you don't drink milk, you can use this method with soy milk! Check out these instructions from I Eat Food, which even tell you how to make the soy milk!
A big jar of fresh yogurt
A little back story: we eat a fair amount of yogurt around here. Emily has been eating it since she was tiny, and from the get-go I bought plain yogurt and added fruit purees instead of buying the commercial stuff. I found that I really needed to buy a better brand of yogurt, but getting those giant cartons was really adding up. I was super-intimidated by the idea of making my own yogurt since all the directions I had read involved either a lot of equipment, or an oven with a pilot light, or a system involving warm water and a cooler.....but then, I read the book Milk
. It was a revelation, seriously. (I recommend it highly to anyone interested in dairy...the "white magic" experiments alone are worth the price of the book. And are the subject of yet another blog post that's sitting in draft mode.....) And her method for making yogurt? So easy. All you need is a candy thermometer, large pan, and wide-mouth thermal containers. No yogurt maker, no cooler, none of the other stuff I'd always seen called for in various methods.I tried it, it worked, and I've made all our yogurt for about 2 years now. Here's how I do it (after some tweaking and experimenting). You will need: milk (I prefer whole milk), some starter yogurt (it can be anything as long as the cultures are live; I started mine with Stonyfield Farm plain), your candy thermometer
, and at least one wide mouth thermal container (I use this Sky Thermal Food Carrier made by Imusa and available locally for about $8). Optionally, a large sieve and straining cloth if you want a thicker yogurt.Yum!
Get started: clip your thermometer onto a saucepan, then pour in enough milk to fill the wide mouth container you will use -- 6 cups of milk will fill a 48 oz container and makes a decent size batch. I make twice that, but like I said, we eat a lot of yogurt. Turn the heat on low-med and heat the milk -- stirring occasionally -- until the temp reaches 180º. Note: if you, say, forget that you're making yogurt and lose track of time, your milk can go up to about 220º and it will still make perfectly good yogurt. It won't taste as fresh but you don't need to throw it out or anything. Not that I'm admitting that's happened to me....just saying.
Turn off the heat, and let the milk's temperature drop to about 120º. When it gets close, fill your thermal container with hot water and let it sit for at least 5 minutes. Get your starter yogurt out and put a few tablespoons into a small bowl (I use maybe 2 tablespoons per 6 c milk but my experience has been that you don't need to be too precise) and let that sit as well.
When the milk cools down to 120º, remove the thermometer and skim off any skin that may have formed, then ladle some milk into the bowl with the starter yogurt, whisking until ismooth. Add more milk if it's too thick. Pour the mixture back into the saucepan with the rest of the milk and stir. NOTE: do not let it go below 120º, this is the one mistake that will ruin the yogurt.
Empty the thermal container and wipe dry, pour milk mix into container and close it up. Let sit for 5-6 hours. Your timing my vary - you'll get a feel for how long it needs to sit based on your particular milk/yogurt/environment over time.
When it's time to check it, open the lid of the container and carefully use a spoon or spatula to just check the texture of the yogurt -- it should be like a soft custard. At this point you can either use it as it is -- just pot it up and refrigerate it, or for a smoother yogurt, pour it into a large bowl and stir before potting up. Or, at this point you can drain it for a "greek-style" yogurt. Which is what we do.
To drain it, I use a mesh strainer over my biggest stockpot, with an old (and very clean) tea towel lining the strainer. You can use fine cheesecloth, gauze, or even an old piece of cotton as long as it's clean and lint-free. Pour the yogurt into the strainer and cover (with a towel, or anything, just for dust -- I can sit the lid of the pot on top of the strainer, so I do that). You'll hear the whey start dripping right away! It takes 1-2 hours to drain, depending on your strainer and cloth -- I only need about an hour. You want about 2 cups of whey to come out of a 6 cup batch. Again, this doesn't need to be too precise. The longer you drain it, the thicker it gets, so try different draining times to see what you like best.
Here's how thick I make my yogurt. Do you think I go overboard a little?
When it's ready, scrape it all into a large bowl and you can do two things -- if you want it to be very set, just mix it with a wooden spoon a few times to smooth it out. It will be very firm but it will have small lumps in it. If you want it to be very smooth, whisk it briefly. This will break the curd, so the final product will be looser, but very smooth. I do it the 2nd way.
Finally, just put it in the fridge and let cool! Then add whatever mix-ins you want. We add strawberry puree and peach puree for Emily; I mostly eat it with a little honey mixed in, or preserves (cloudberry jam yogurt is delicious!) This will last a lot longer than commercial yogurt -- I've never had mine go bad, just get more and more sour. Just remember that you need to save a little starter for your next batch.
Cloudberries in my yogurt!
A few final notes:
I don't scald or sterilize anything. I haven't had anything weird happen, even the yogurt that has gotten left by accident has never grown anything, just gotten more and more sour.
I have successfully restarted my yogurt from a bit of frozen starter after travelling, so if you're going away just pop enough to start your next batch in the freezer.
If you use skim milk, you may need to add some dry milk to get it thick enough. I have never done this so I don't really know how it works. I'm all about the whole milk yogurt.
If you don't drink milk, you can use this method with soy milk! Check out these instructions from I Eat Food, which even tell you how to make the soy milk!
now, where was I...?
I'm not a fan of "why I haven't been blogging" posts but it's been such a long gap this time, I felt I had to say something. Basically, the last 3 months have been a serious struggle, between massive amounts of snow, the cruddiness of NYC in this year's blizzards, a neighbor's broken water main that created a new ice age on our block and a serious health problem in the family. Work has also been....interesting and a bit volatile. It's going to be a weird year.
Thanks to those of you who have inquired and been supportive through it all. Things are clearing up again, and while I still don't have time to blog (or sew! which is SO UPSETTING!) I figure I can at least start finishing up some of the many, MANY blog posts I have in draft mode. So that's my plan for the short term, especially some of the how-tos I am constantly retelling and rewriting for people, having them up will save me a lot of time!
First up, yogurt!!
Thanks to those of you who have inquired and been supportive through it all. Things are clearing up again, and while I still don't have time to blog (or sew! which is SO UPSETTING!) I figure I can at least start finishing up some of the many, MANY blog posts I have in draft mode. So that's my plan for the short term, especially some of the how-tos I am constantly retelling and rewriting for people, having them up will save me a lot of time!
First up, yogurt!!
Subscribe to:
Posts (Atom)
